Connecting to RabbitMQ Server
In this tutorial, we will walk you through how to effectively use MQTT (Message Queuing Telemetry Transport) — a lightweight and efficient messaging protocol designed for real-time data exchange, IoT solutions, and device communication. By integrating MQTT into the Selfmade Ninja Lab environment, you'll unlock powerful tools to enhance your projects and development skills.
What is a RabbitMQ Server?
RabbitMQ is an open-source message broker used to facilitate communication between components in a distributed system. It enhances system reliability, scalability, and decouples components for independent operation. RabbitMQ primarily supports the Advanced Message Queuing Protocol (AMQP) but also offers compatibility with protocols like MQTT and STOMP, making it versatile for different integration needs. It's a critical tool for building efficient and robust distributed applications.
RabbitMQ excels at handling message queuing, routing, and delivery between distributed applications, making it essential for microservices architecture.
Why Host Your MQTT Service in Selfmade Ninja Lab?
Using Selfmade Ninja Lab cloud lab training for aspiring IT students offers distinct advantages:
| Advantage | Description |
|---|---|
| High-Speed Internet | Ensures seamless operations for your MQTT services |
| Robust DoS Protection | Safeguards your applications against attacks |
| User-Friendly Interface | Easy to set up and navigate |
| Round-the-Clock Availability | Access your services anytime 24/7 |
| Free Enhancements | Includes complimentary tools like MongoDB, Memcache, and more |
| Real-Time Learning | Experiment with cutting-edge technologies in a safe environment |
The integrated lab environment provides all necessary tools and protection for learning message queuing concepts safely.
Getting Started
Step 1: Access Services
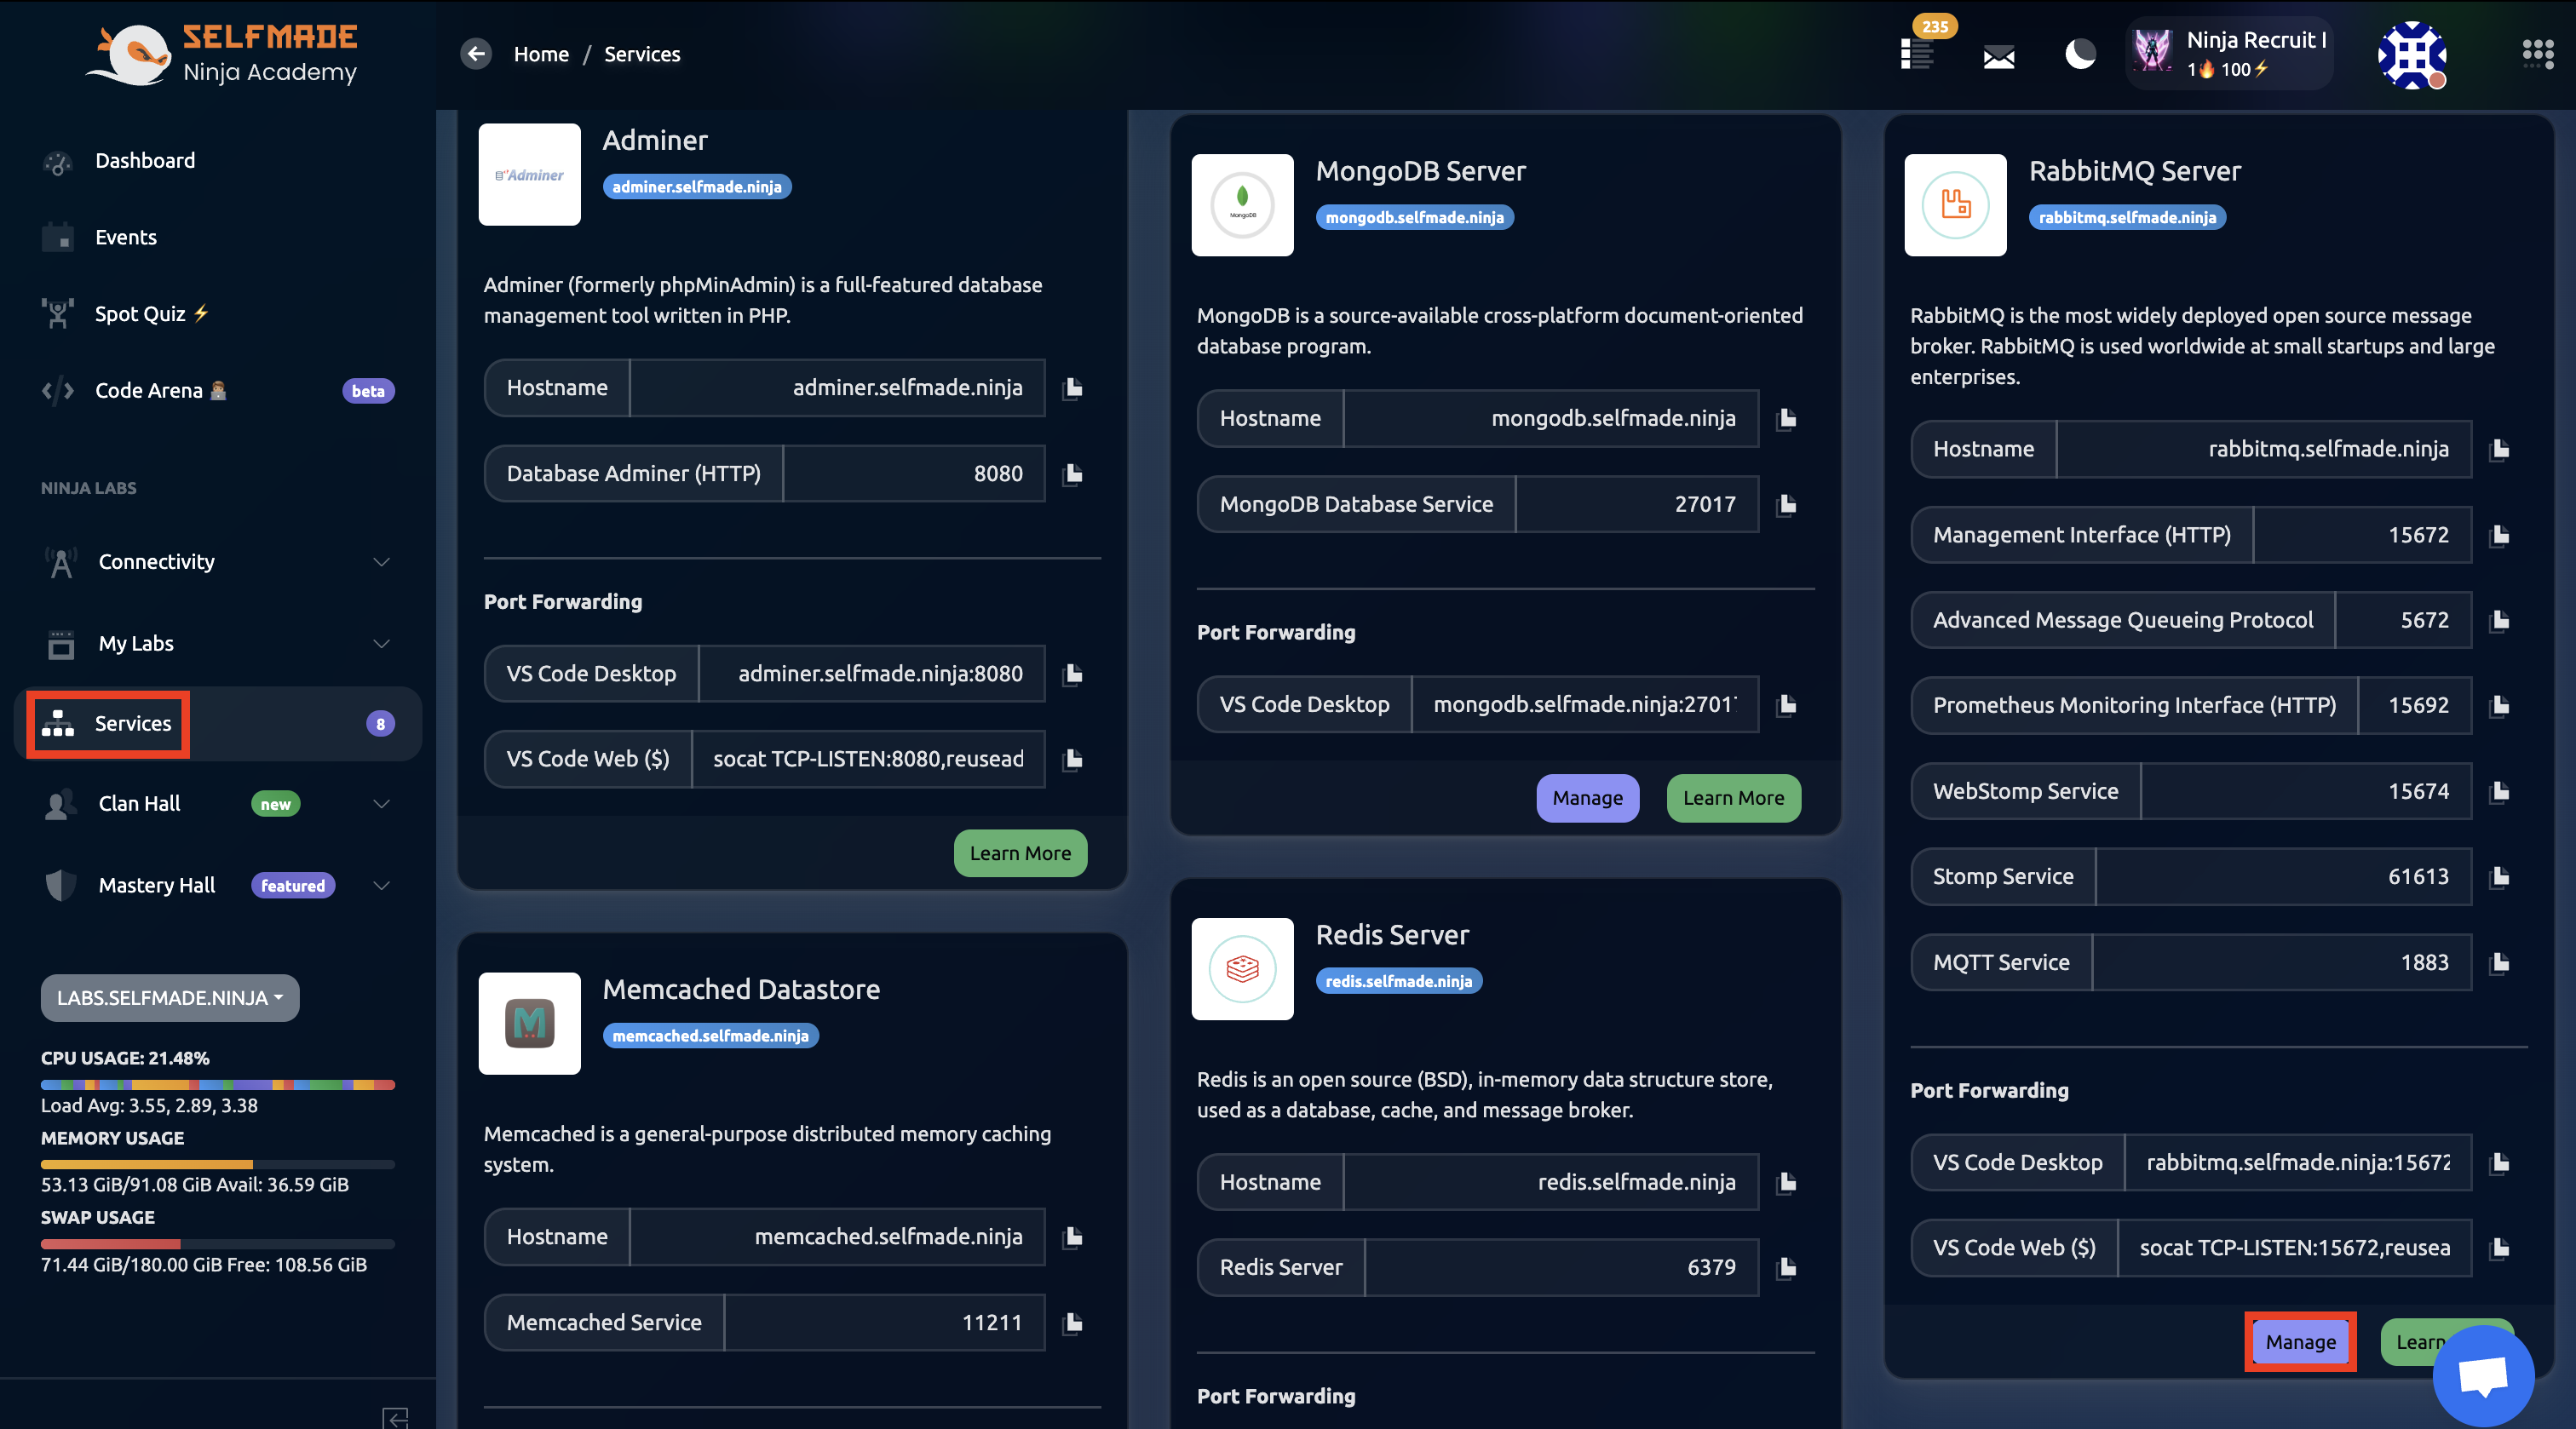
From the right window pane, click on the Services button.
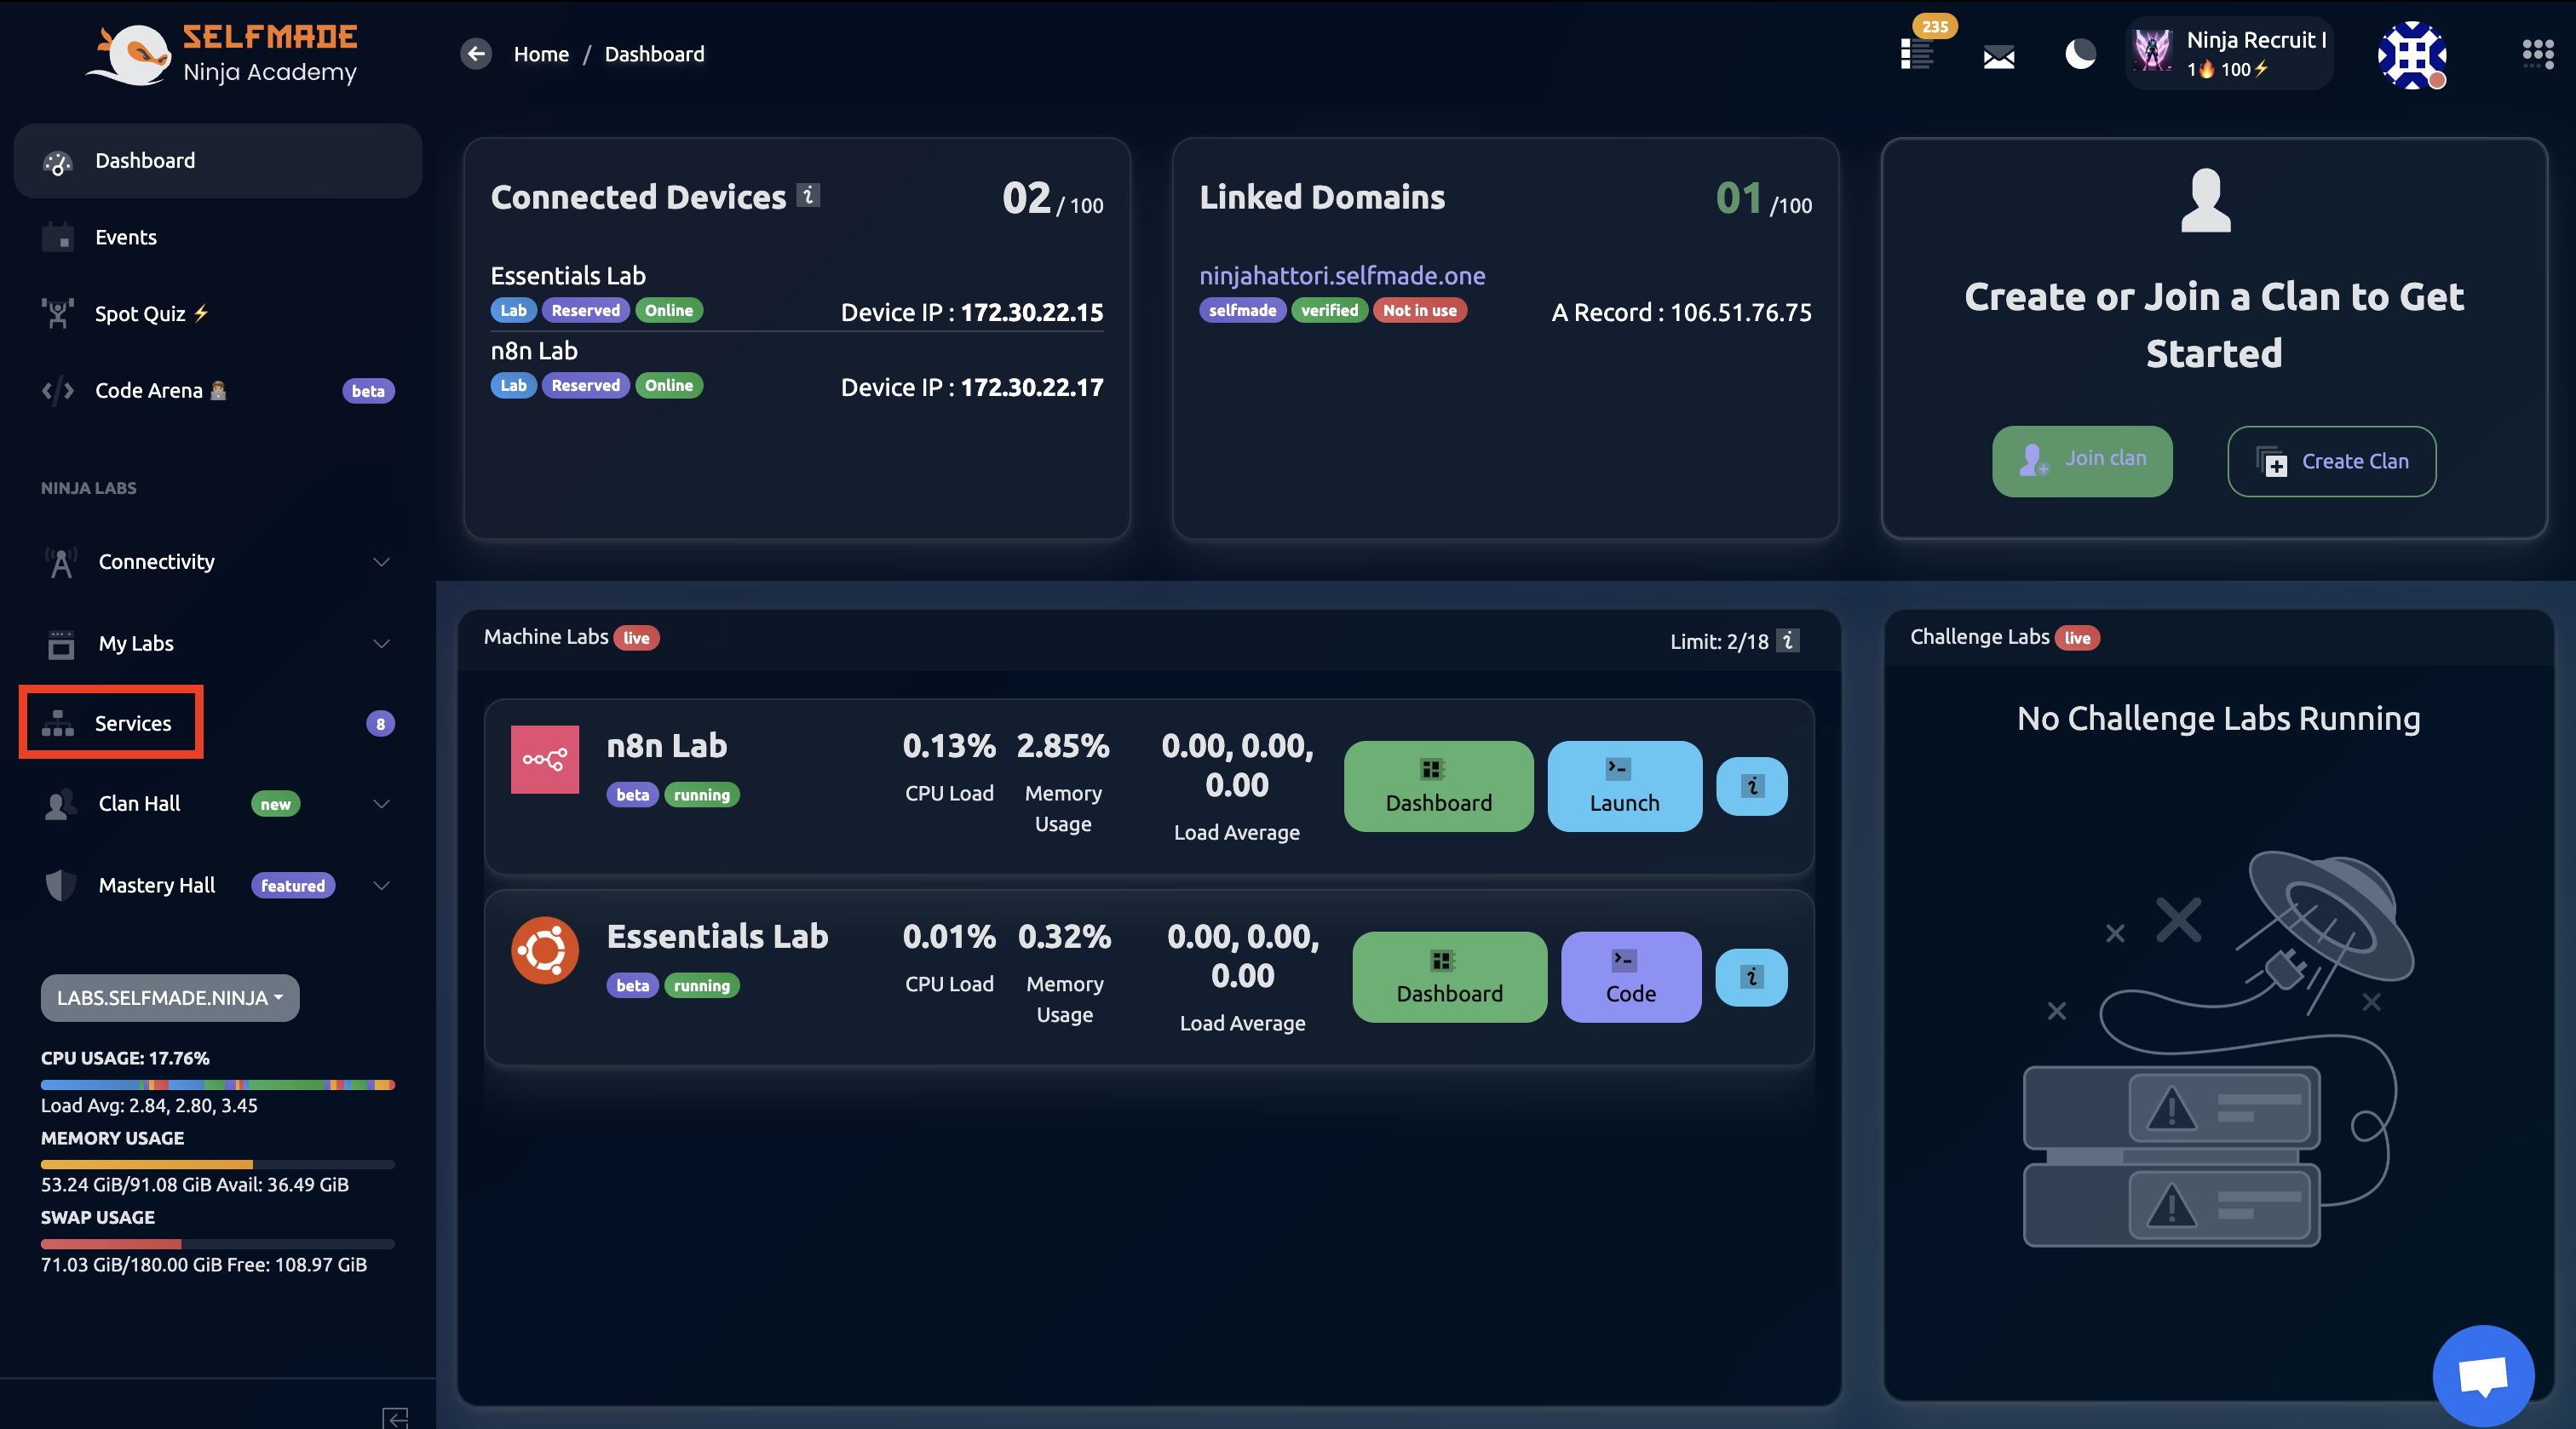
Find the RabbitMQ Service and then click on Manage.
Step 2: Deploy Essential Lab
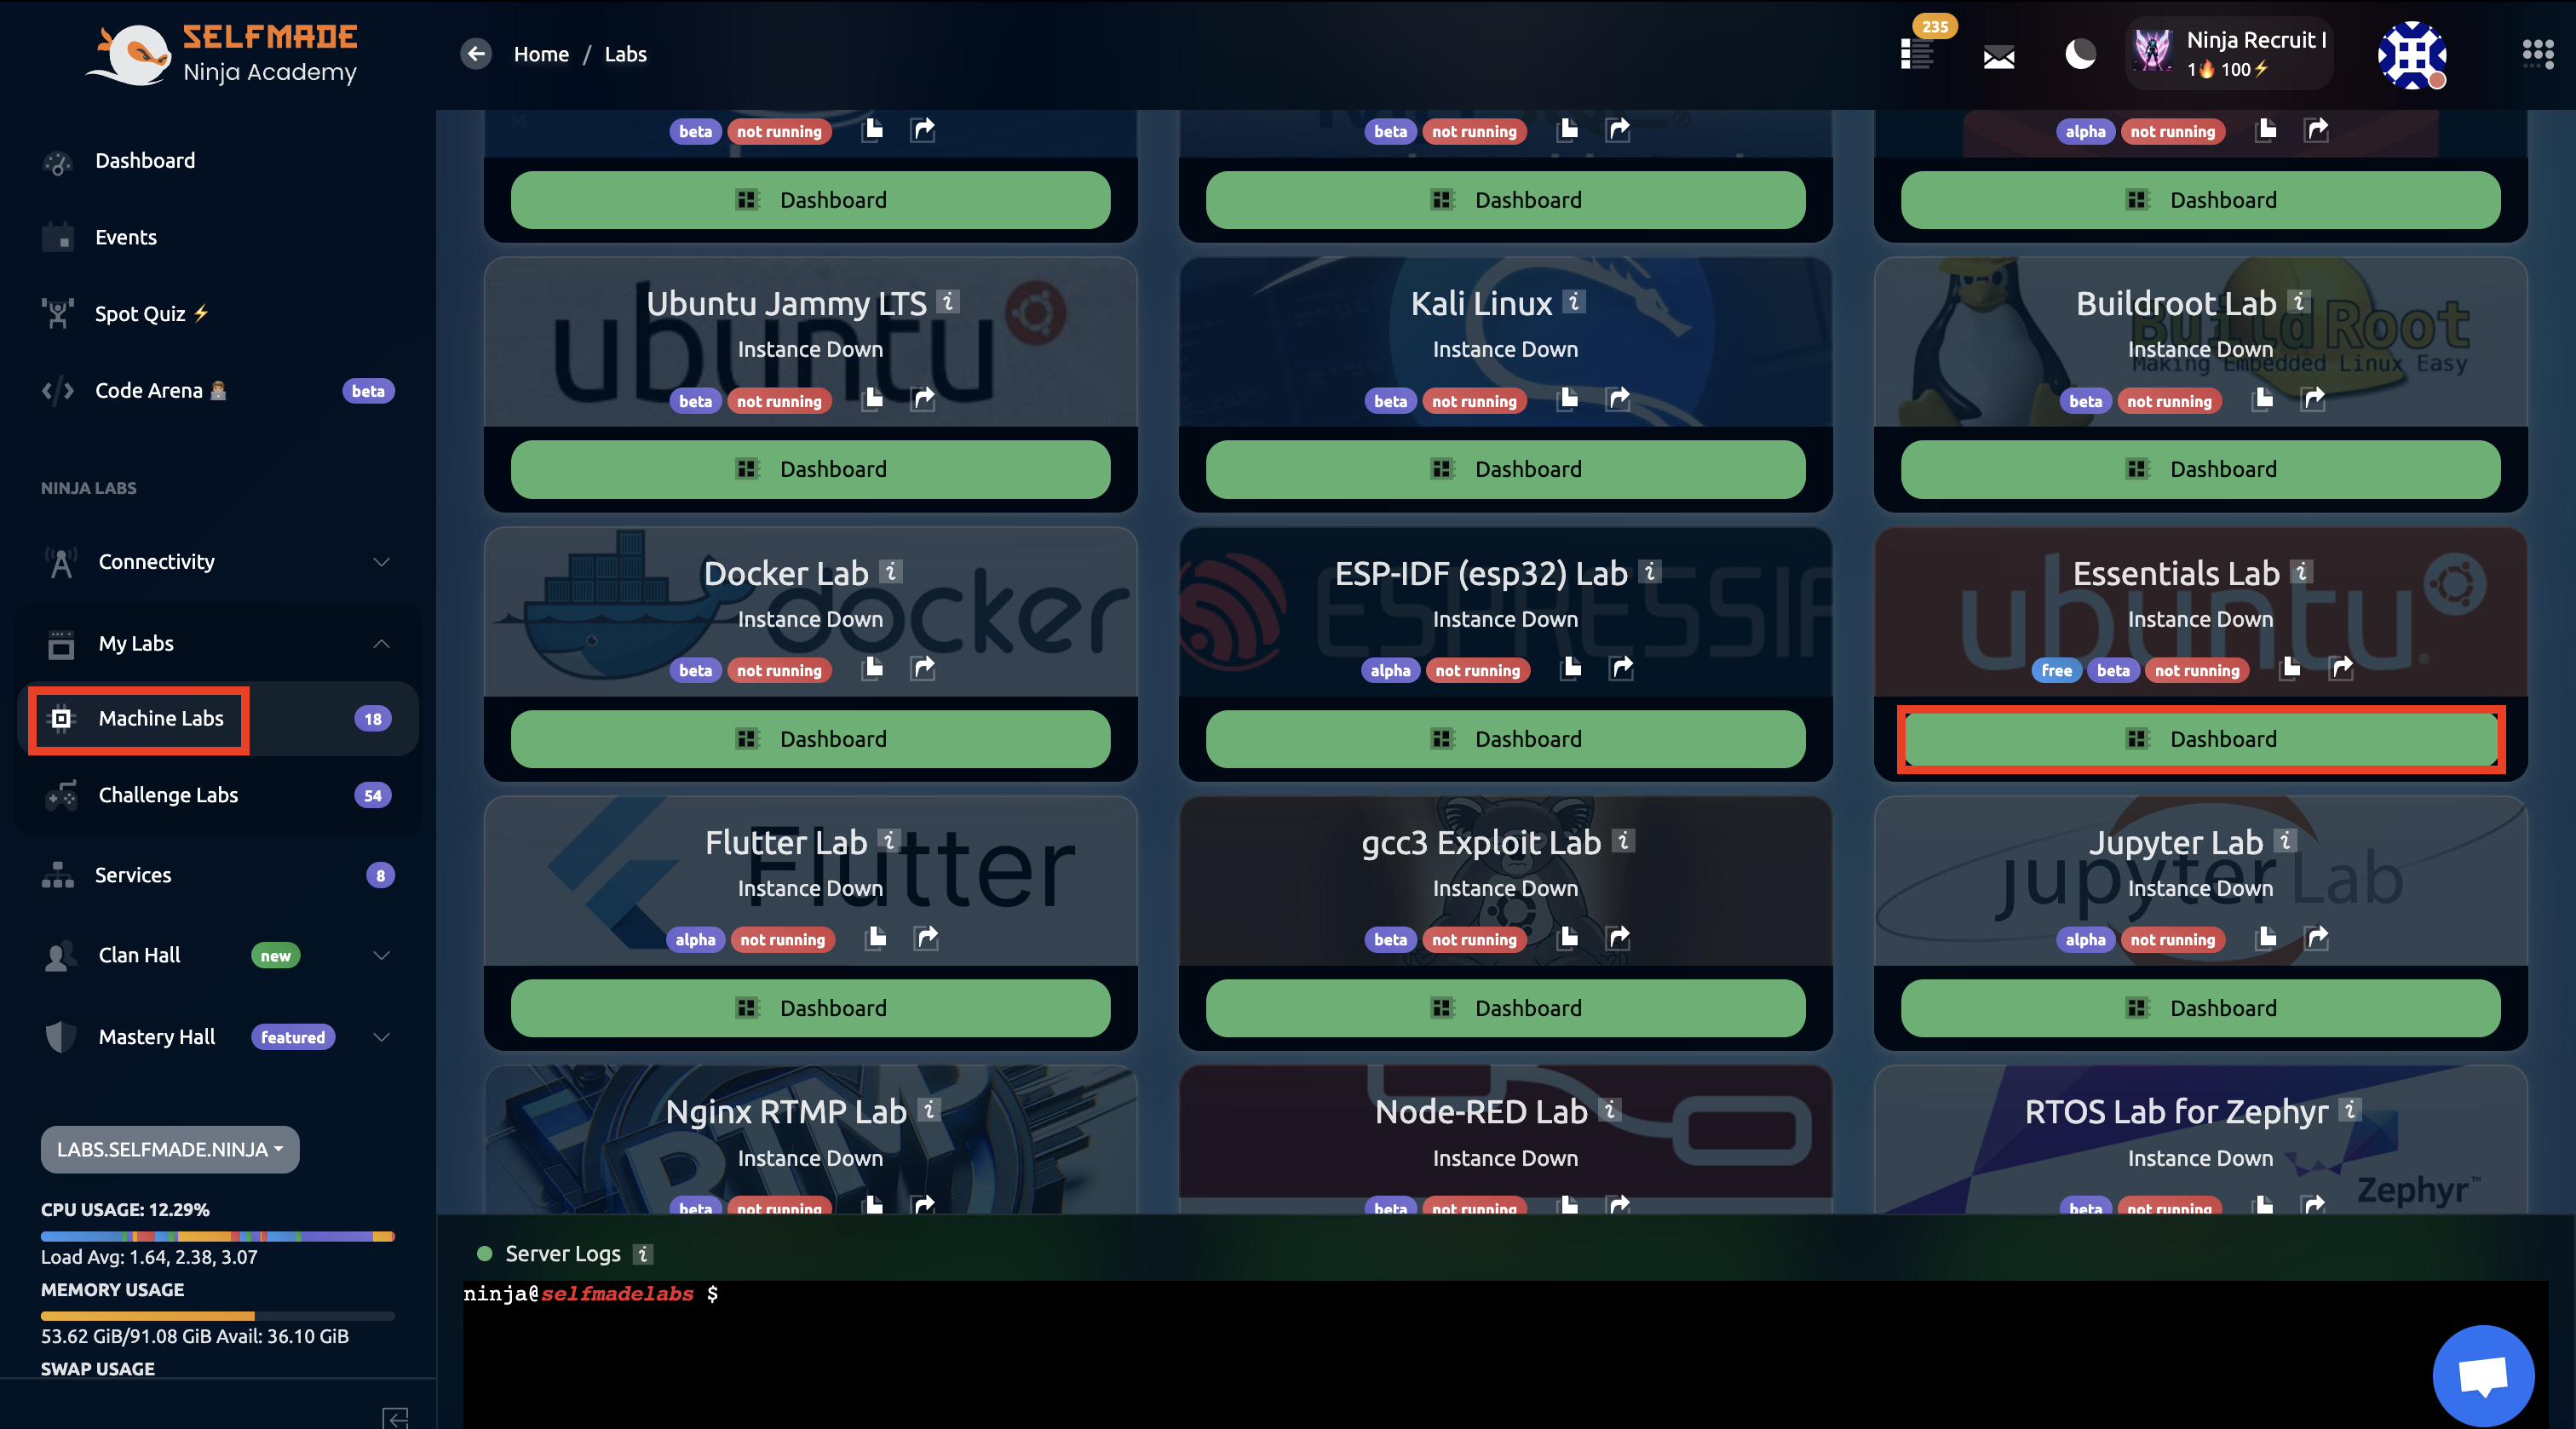
Then, open Machine Labs and then find Essentials Lab. Once you're there, click on Dashboard.
Click on Deploy and then click on Confirm Deploy.
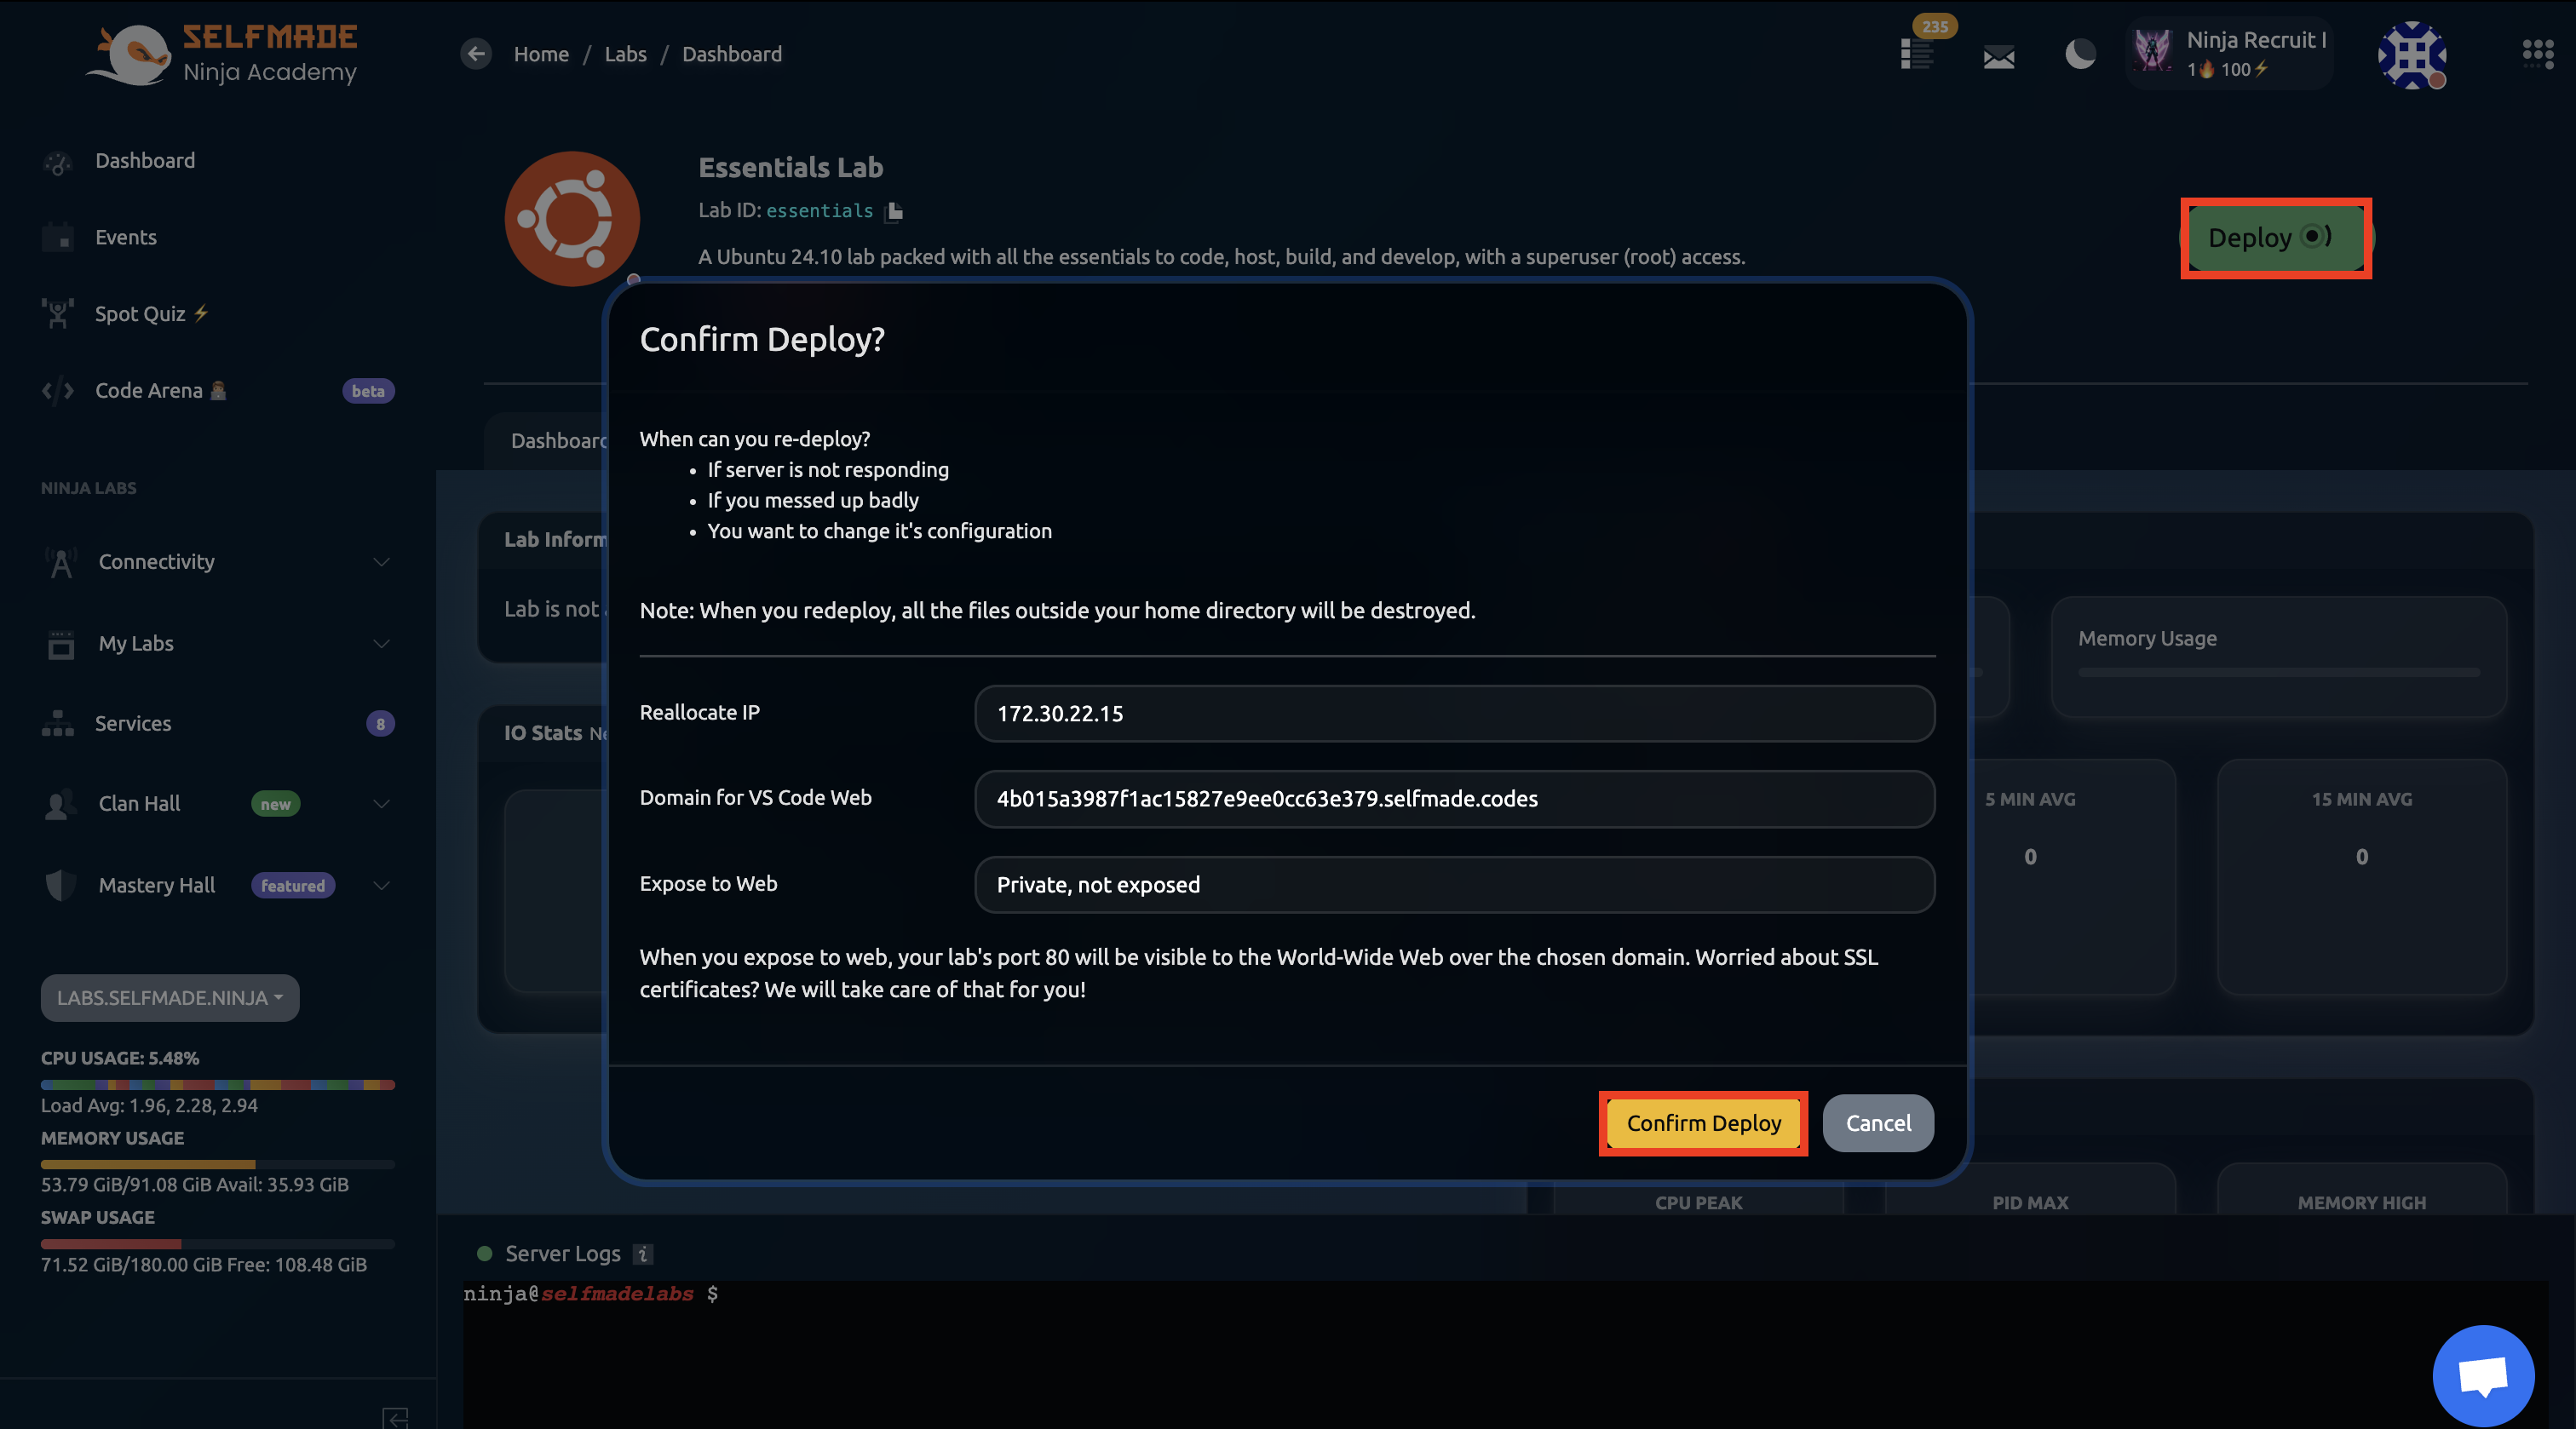
Allow a few minutes for the lab environment to fully deploy before proceeding to the next steps.
Setting Up Development Environment
Launch VS Code
Then, click on Code to launch the VS Code editor and the click on Launch Code IDE. Make sure to copy the Code Server Password.
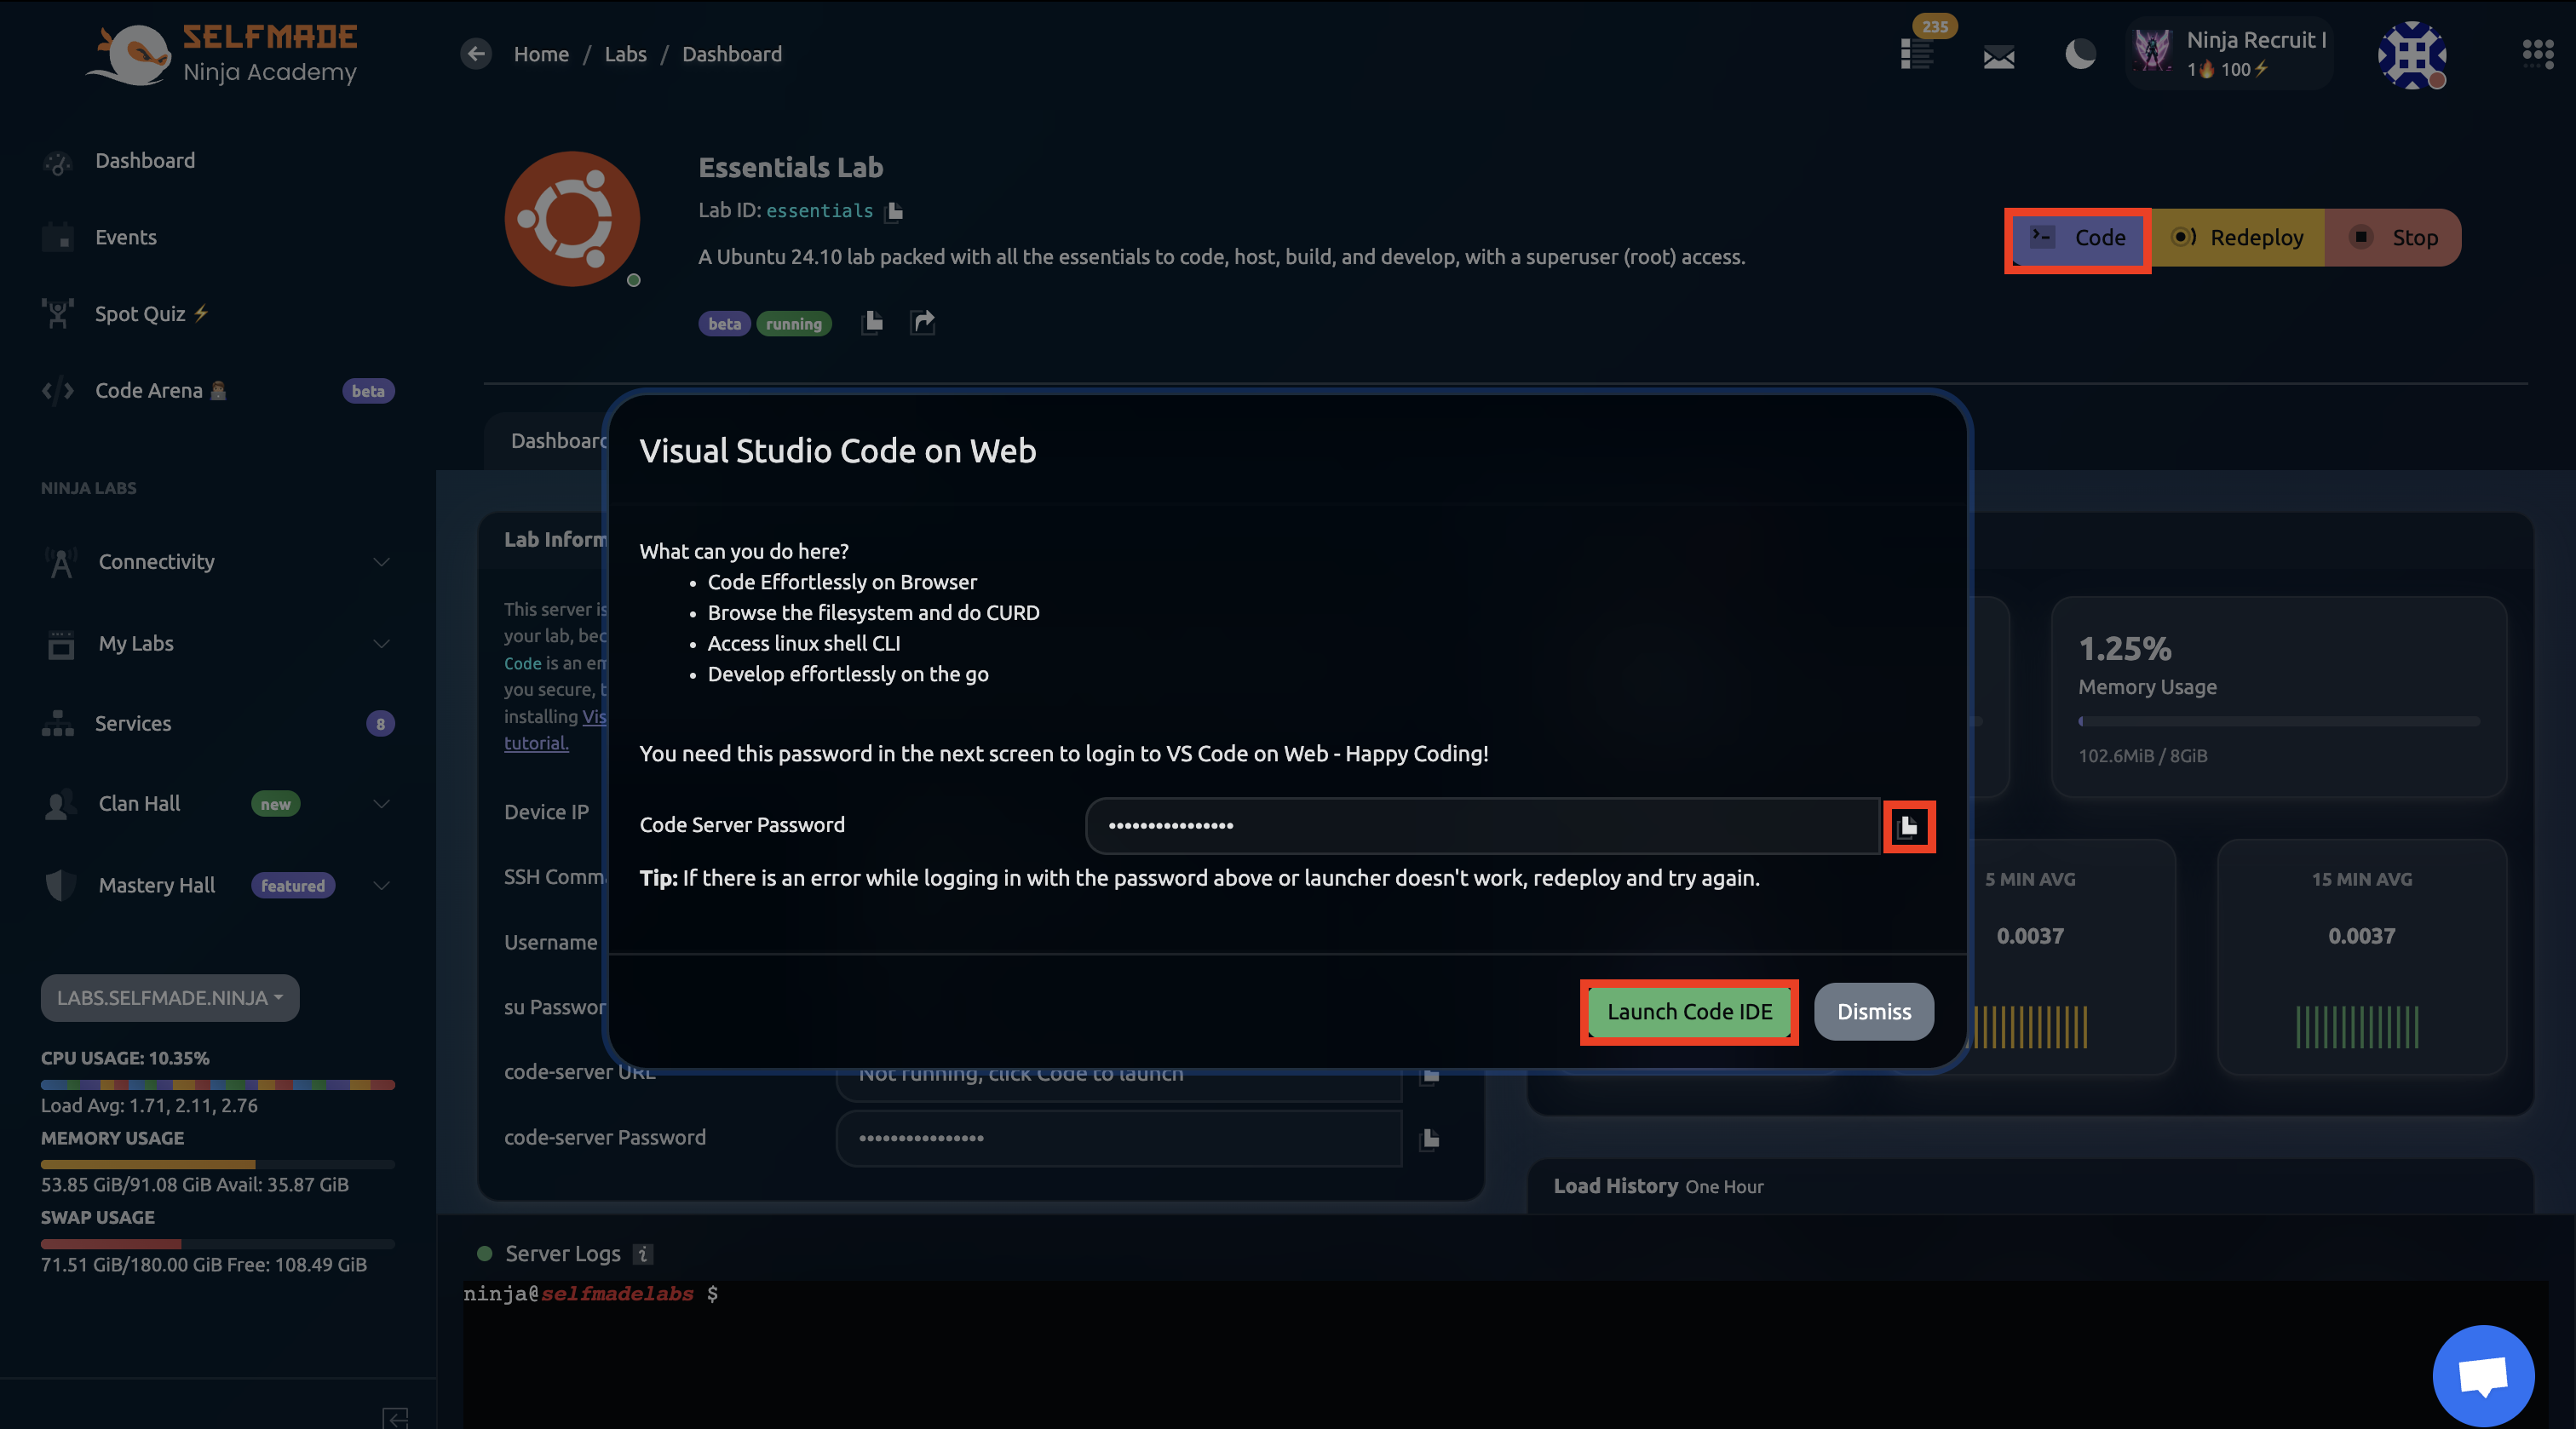
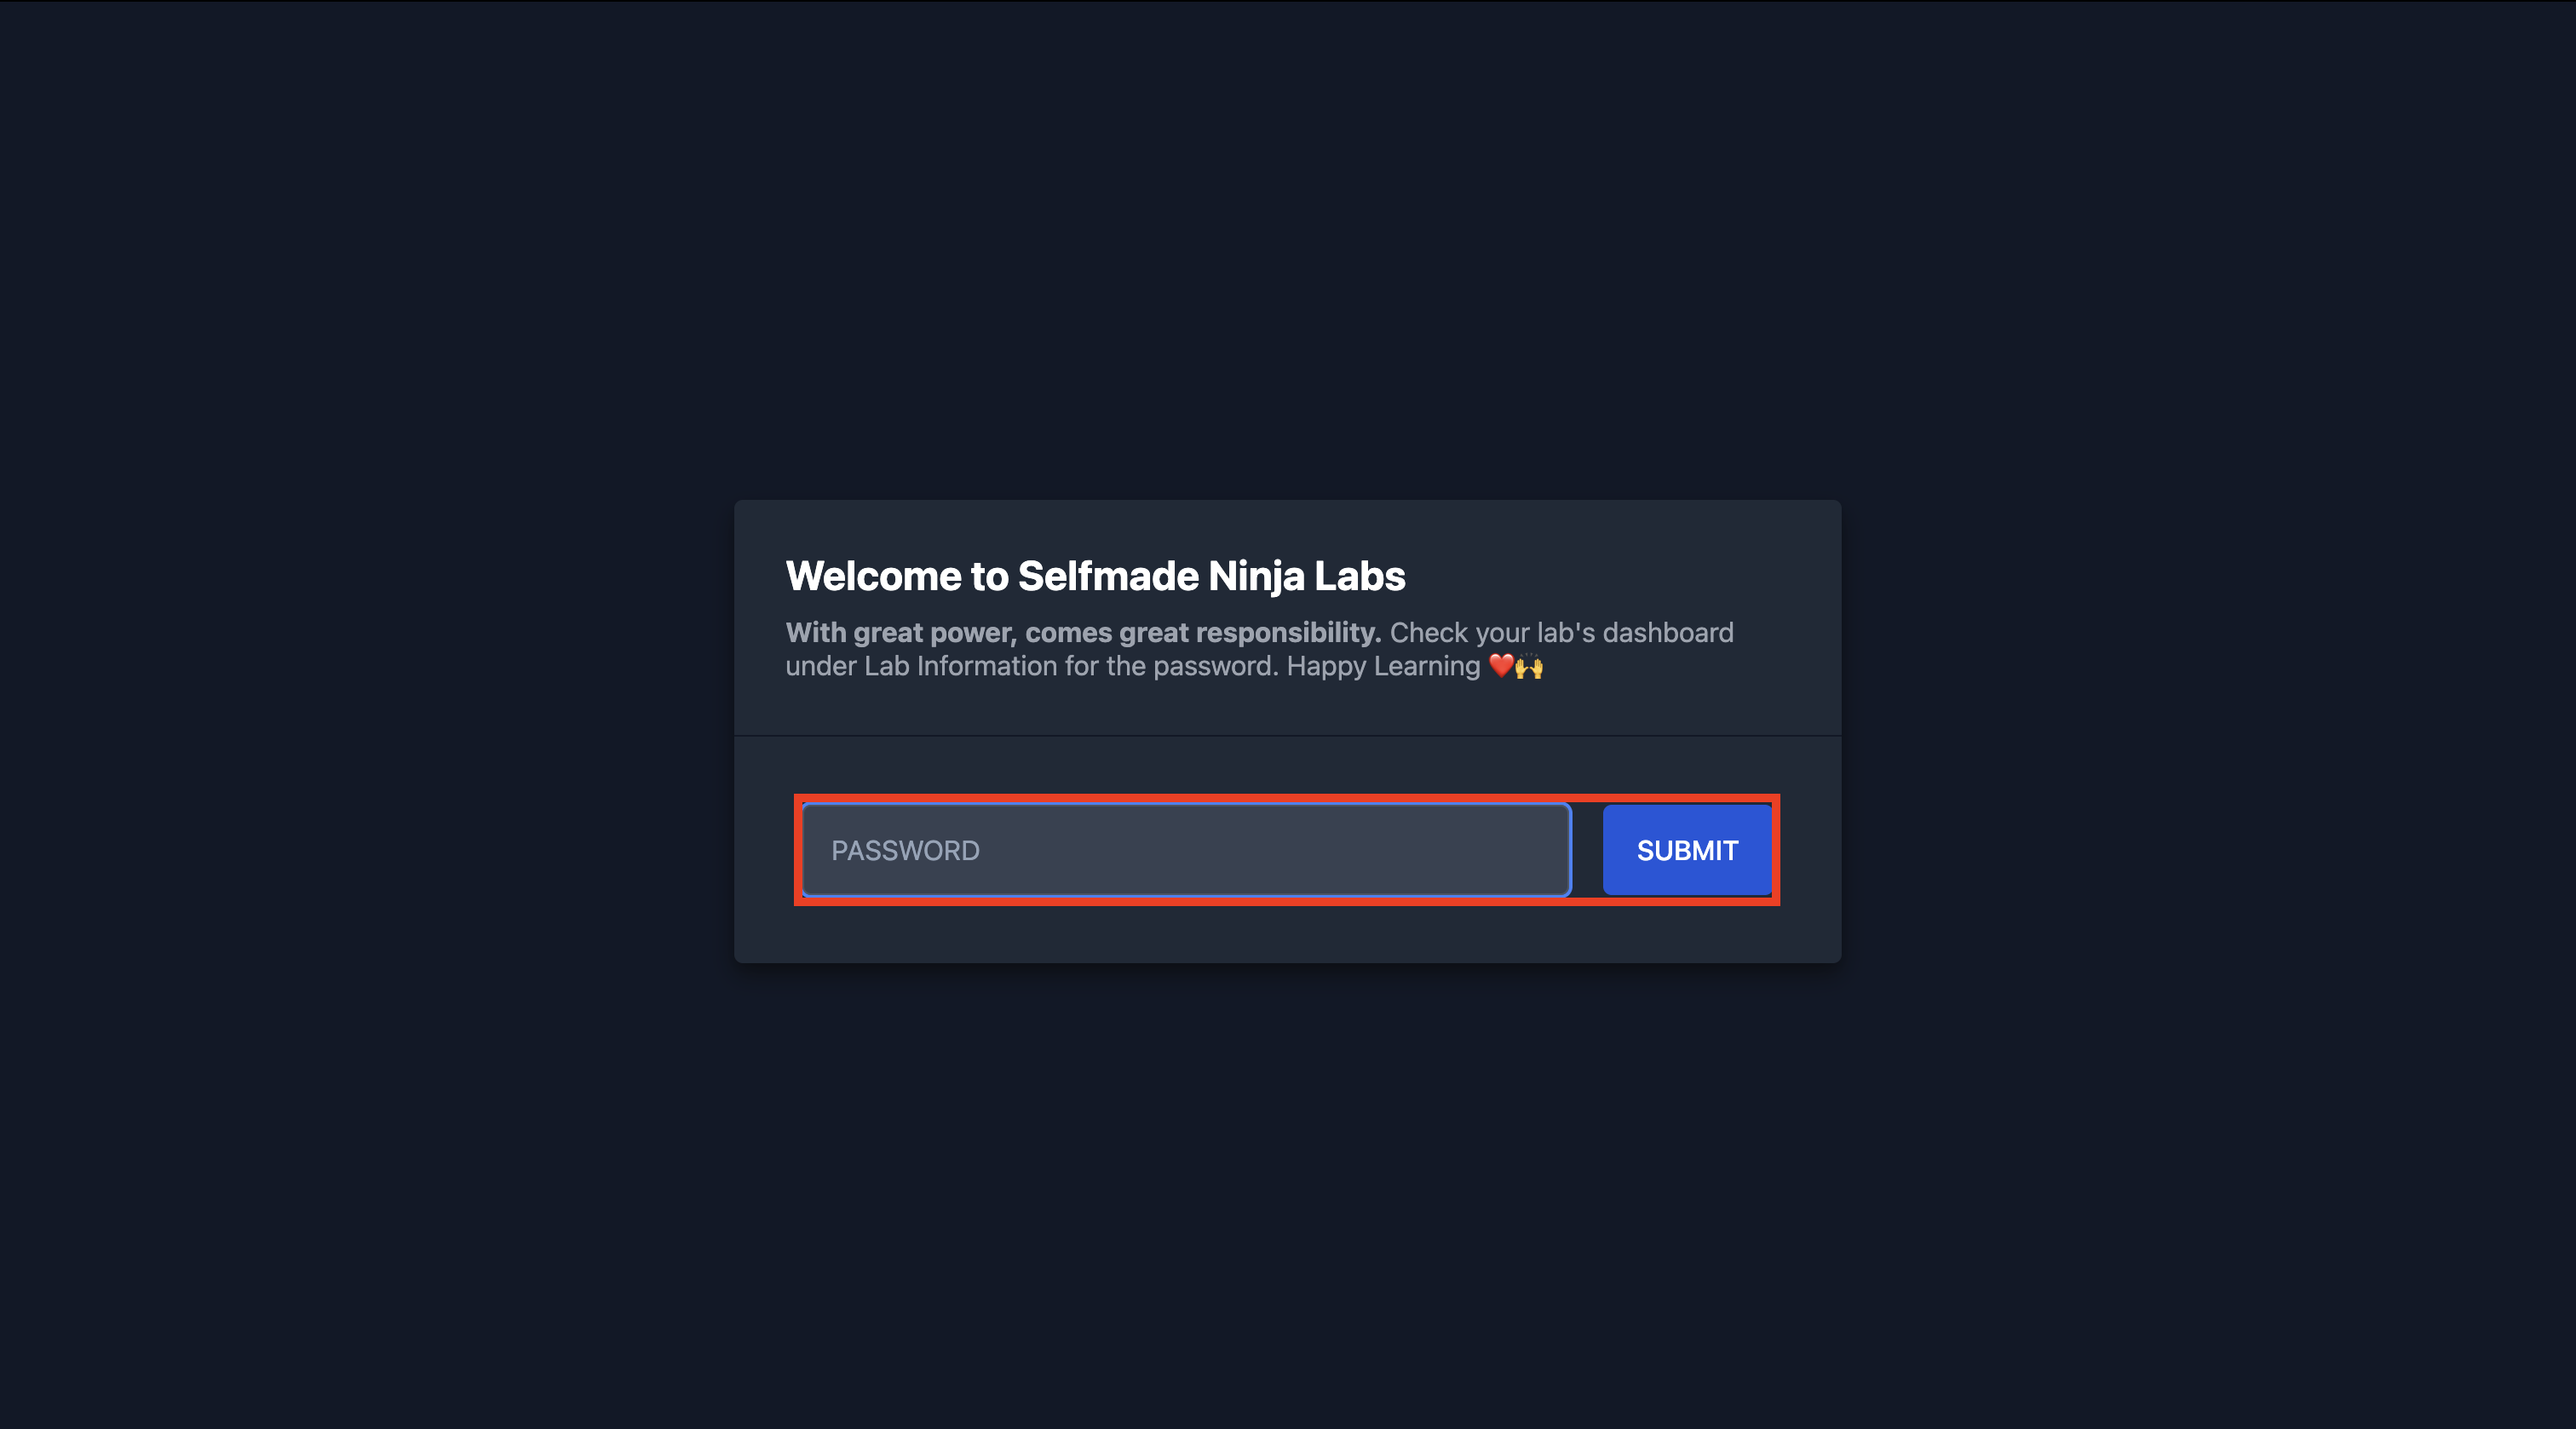
Once you click on Launch Code IDE, this will open a Selfmade Ninja instance in another tab which will request the server password to let you in, paste the copied password here and then click on Submit.
Your development environment is now ready for RabbitMQ configuration and testing.
Connecting to RabbitMQ
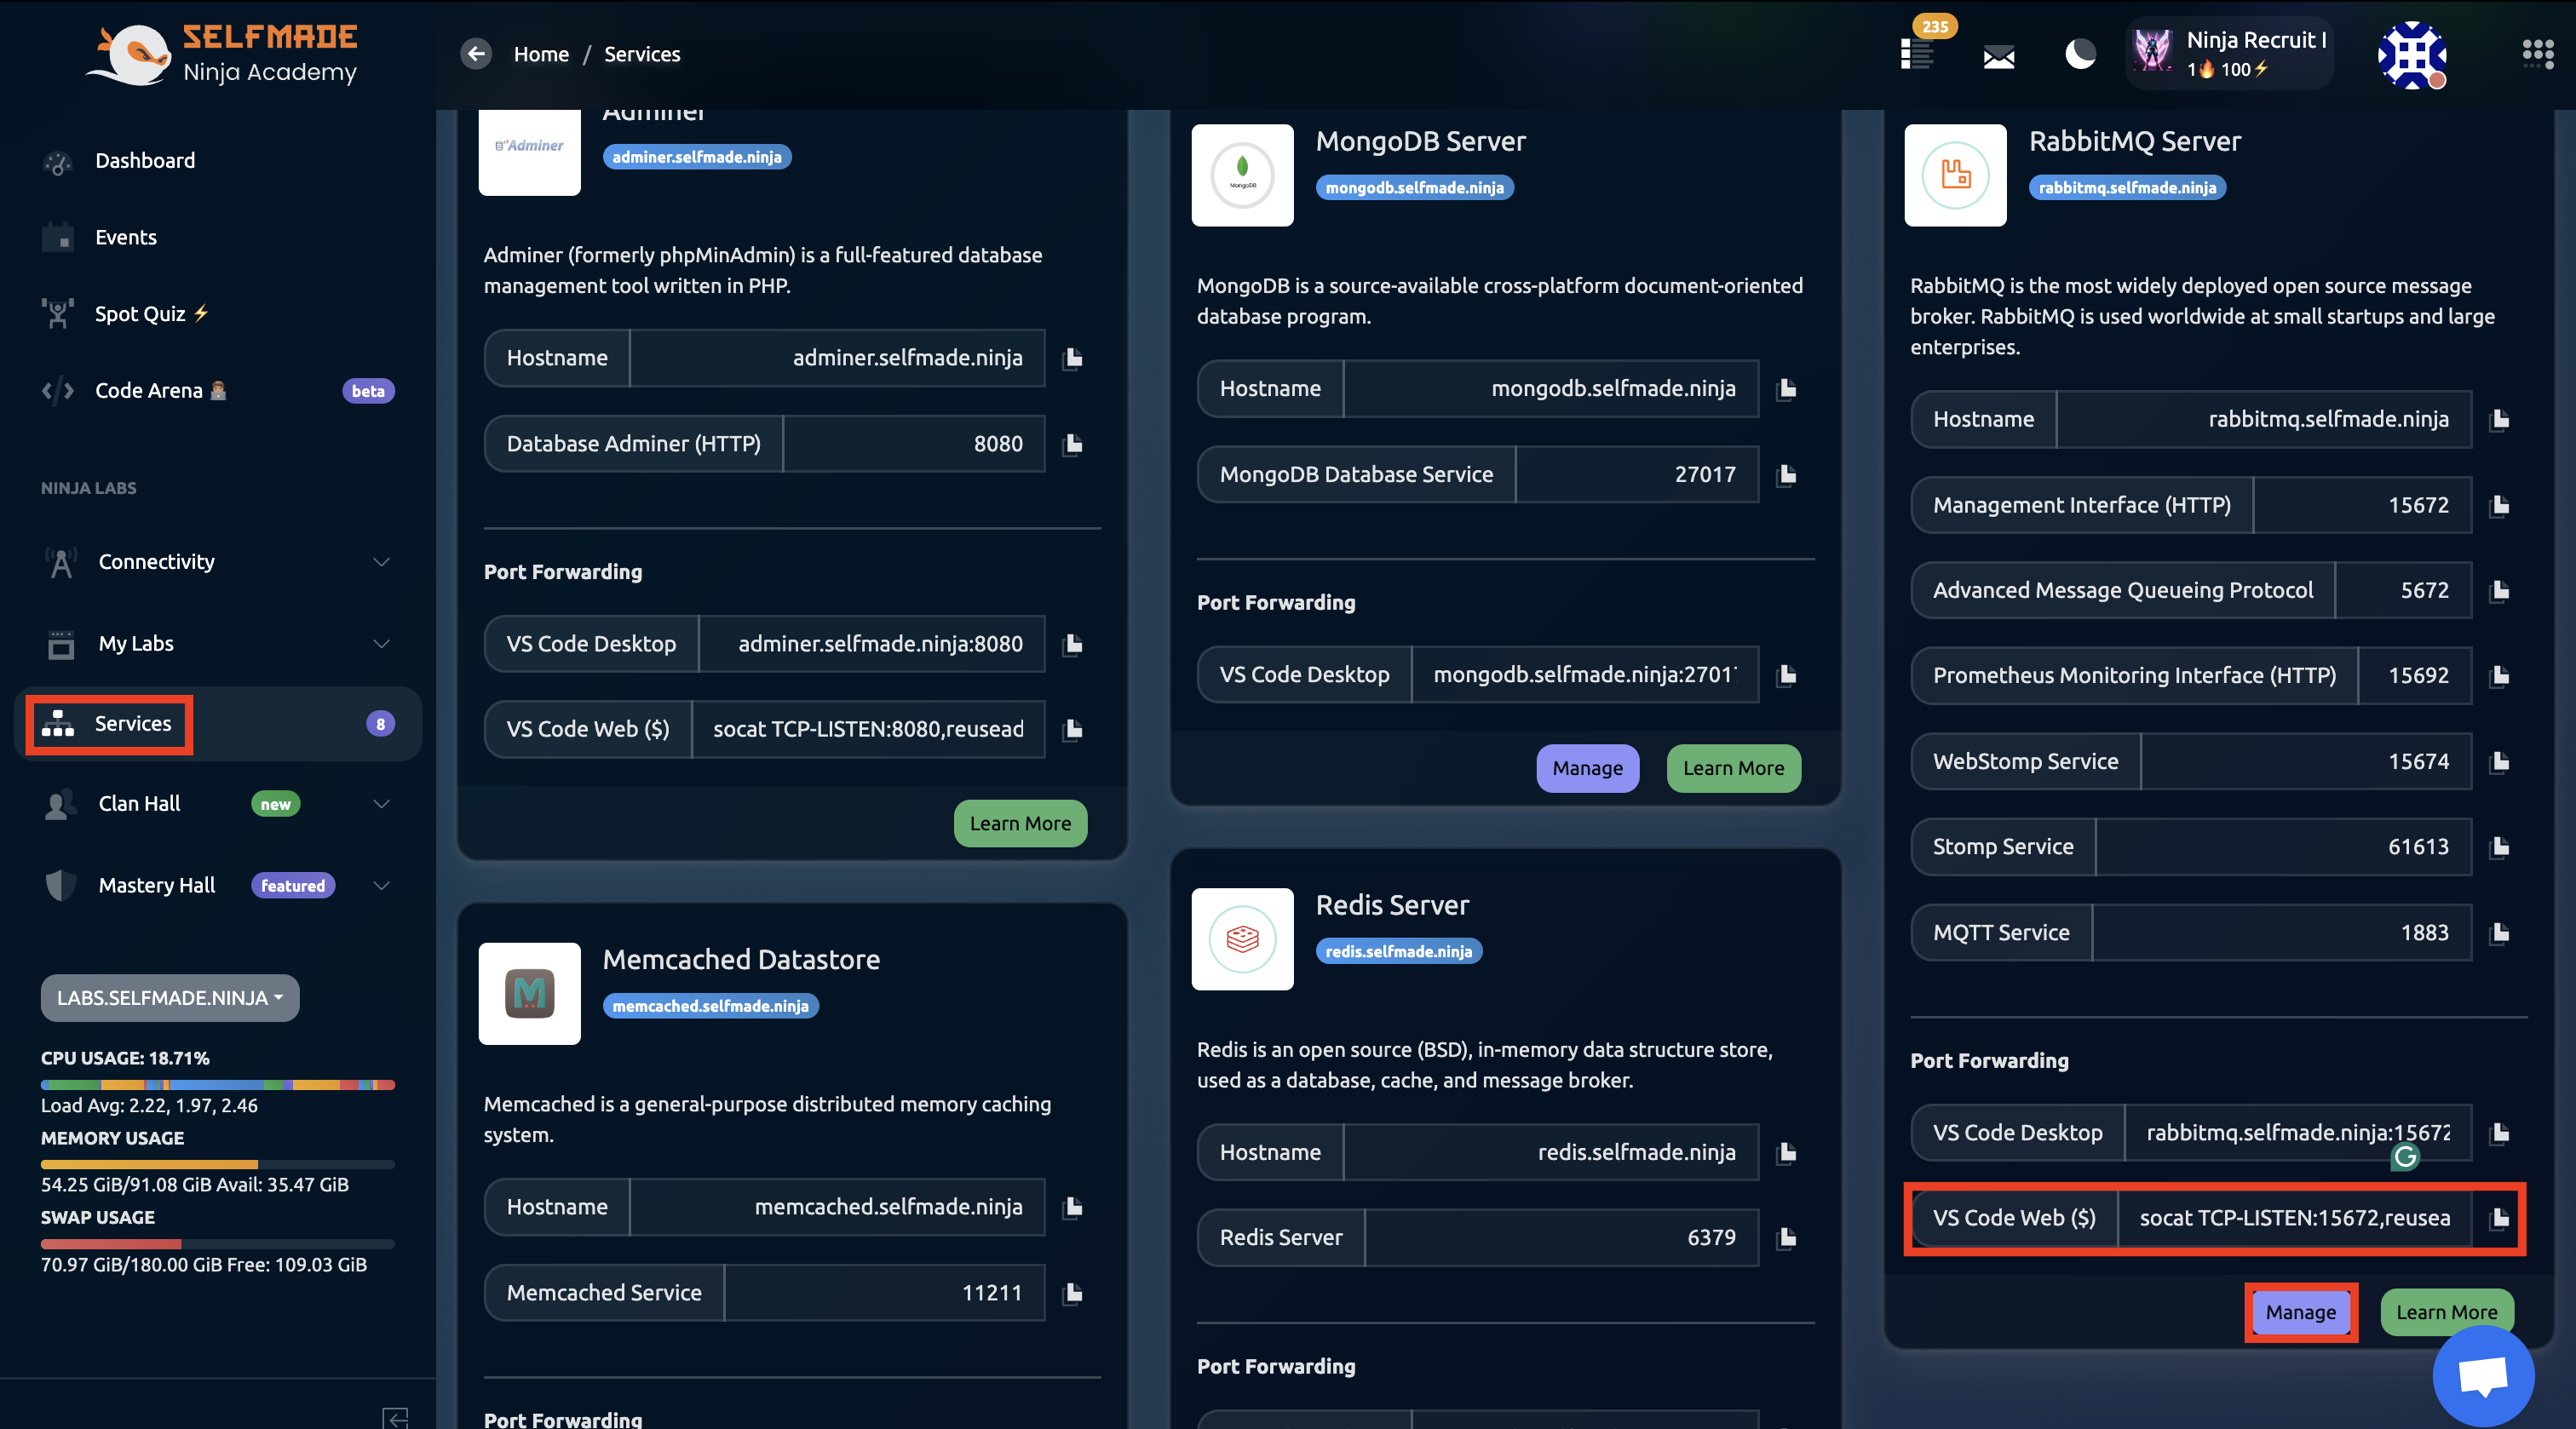
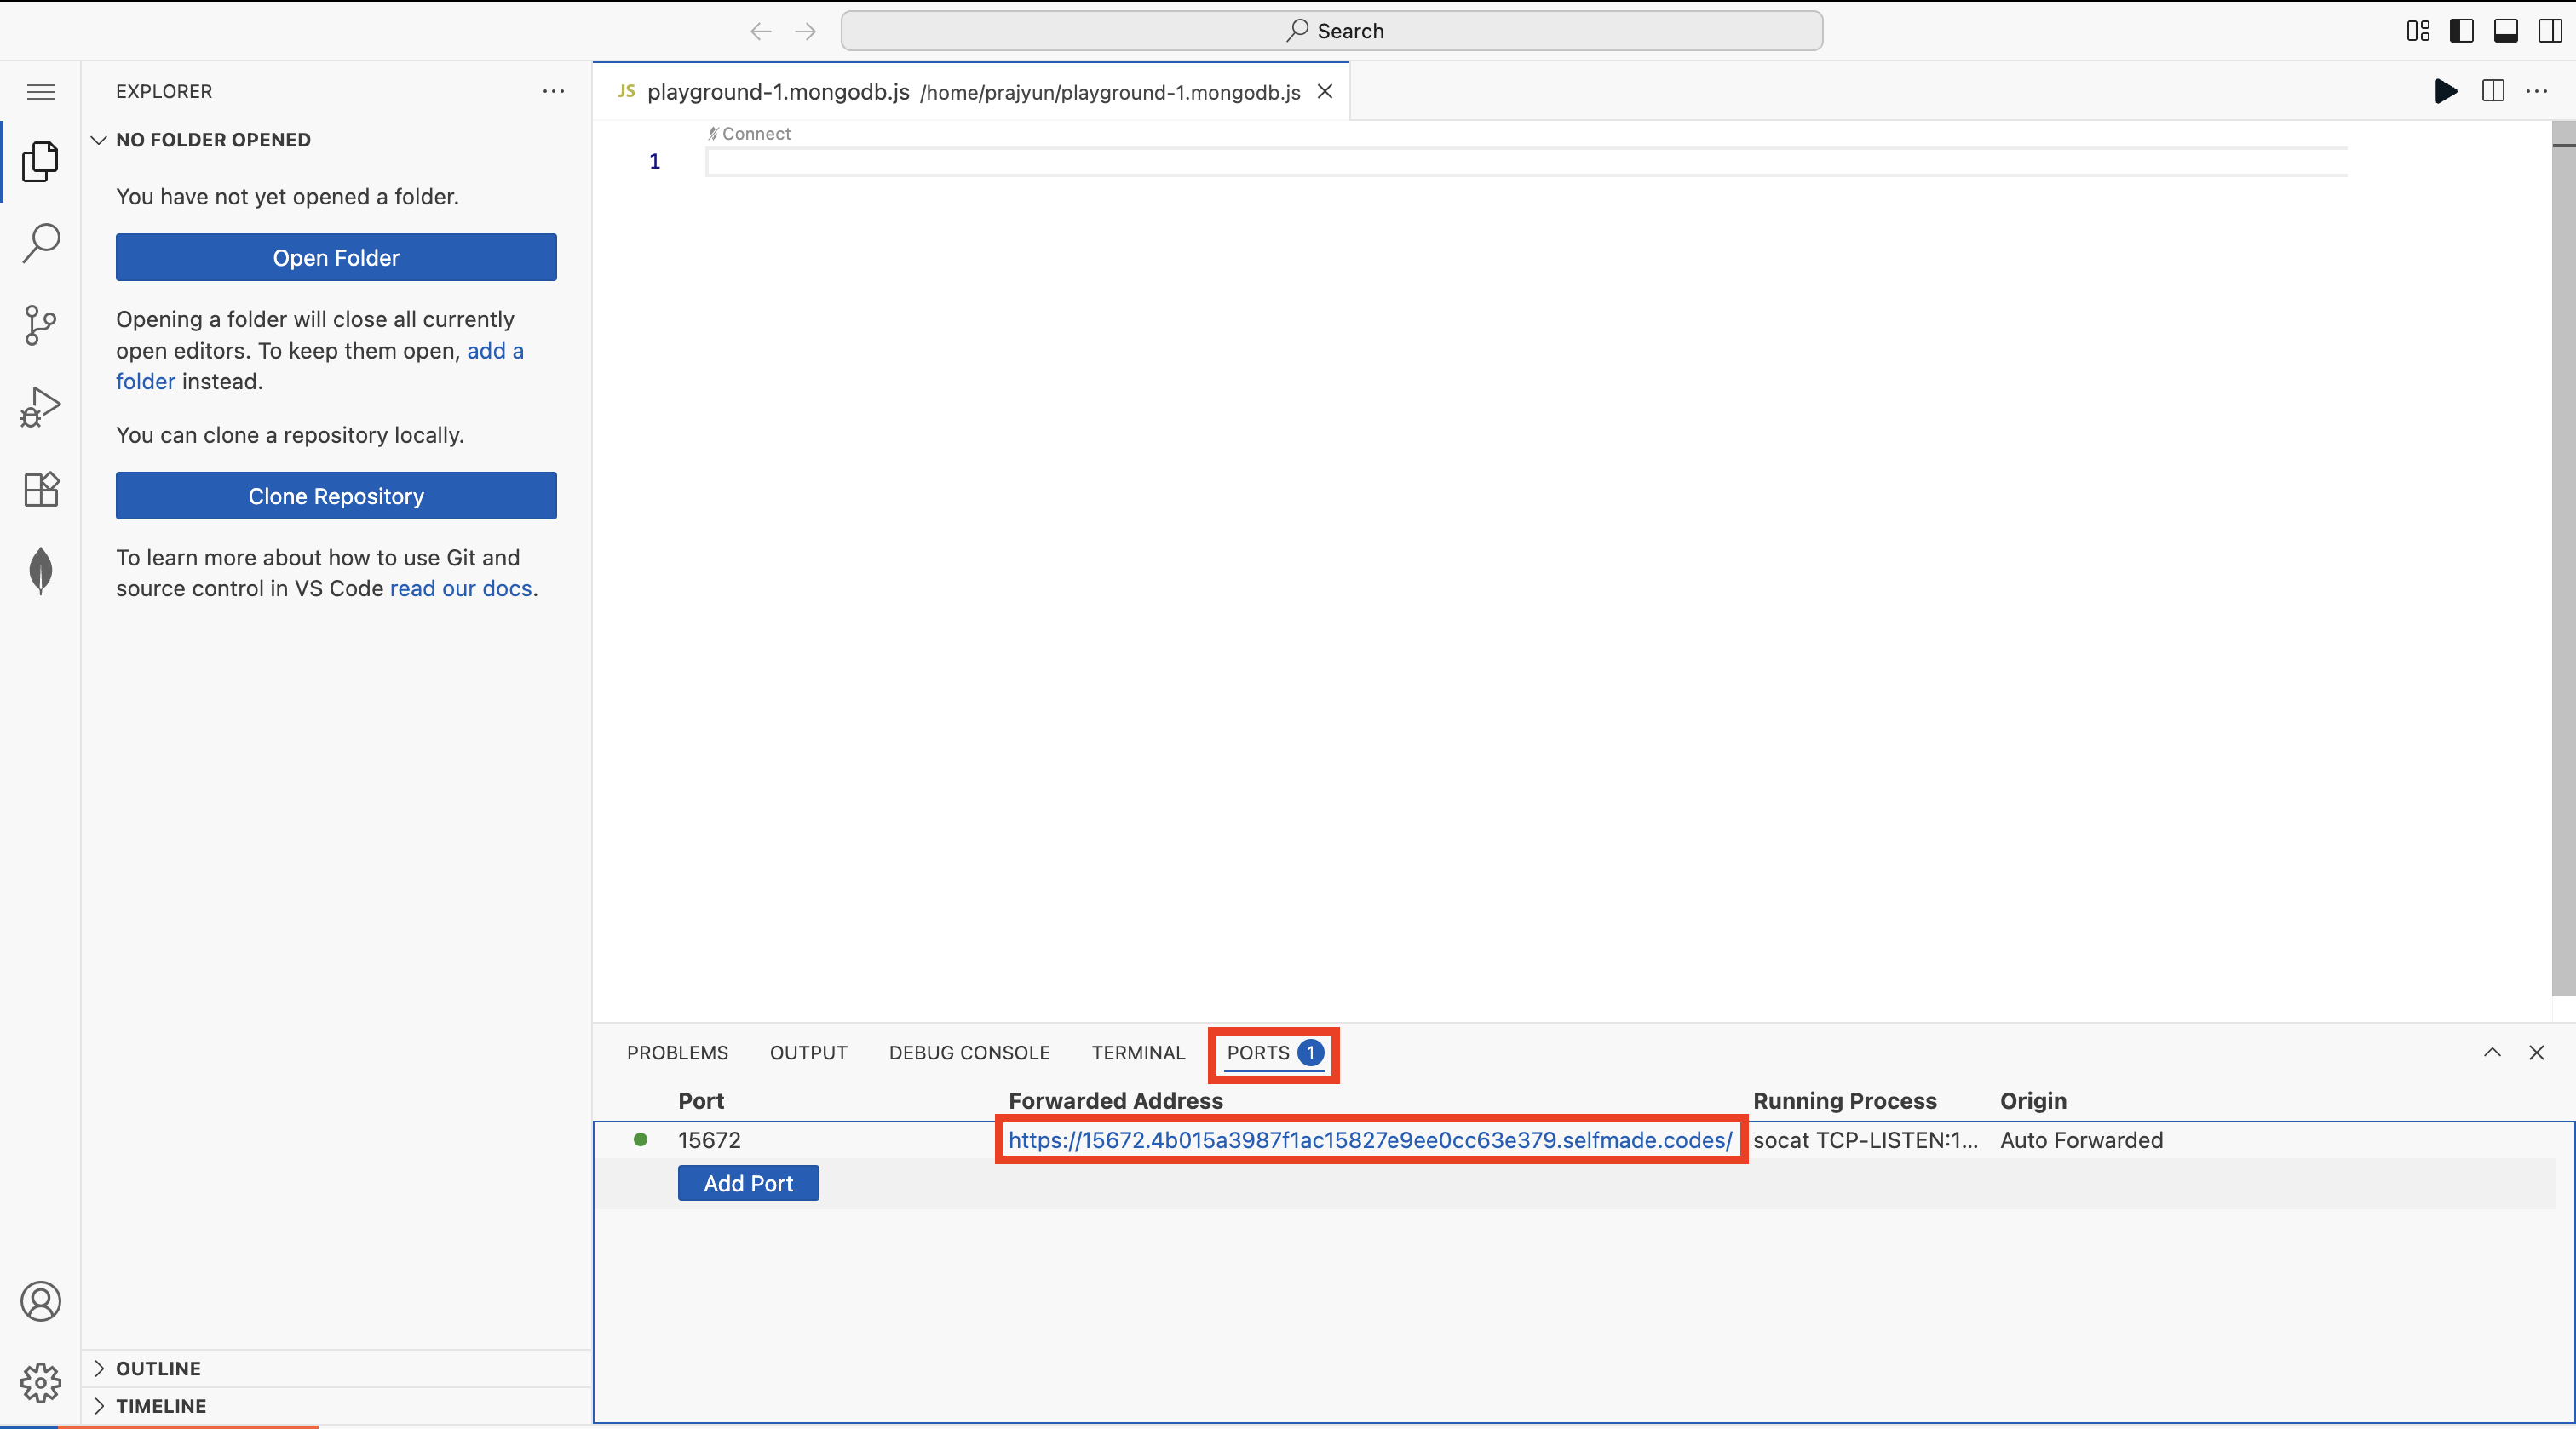
Step 1: Get Port Forwarding Command
Now that you've opened your instance, how do we access the RabbitMQ Server inside of it?
From the main dashboard page, click on Services and then find the RabbitMQ Server. Here, find the VS Code $ port forwarding code and copy the command.
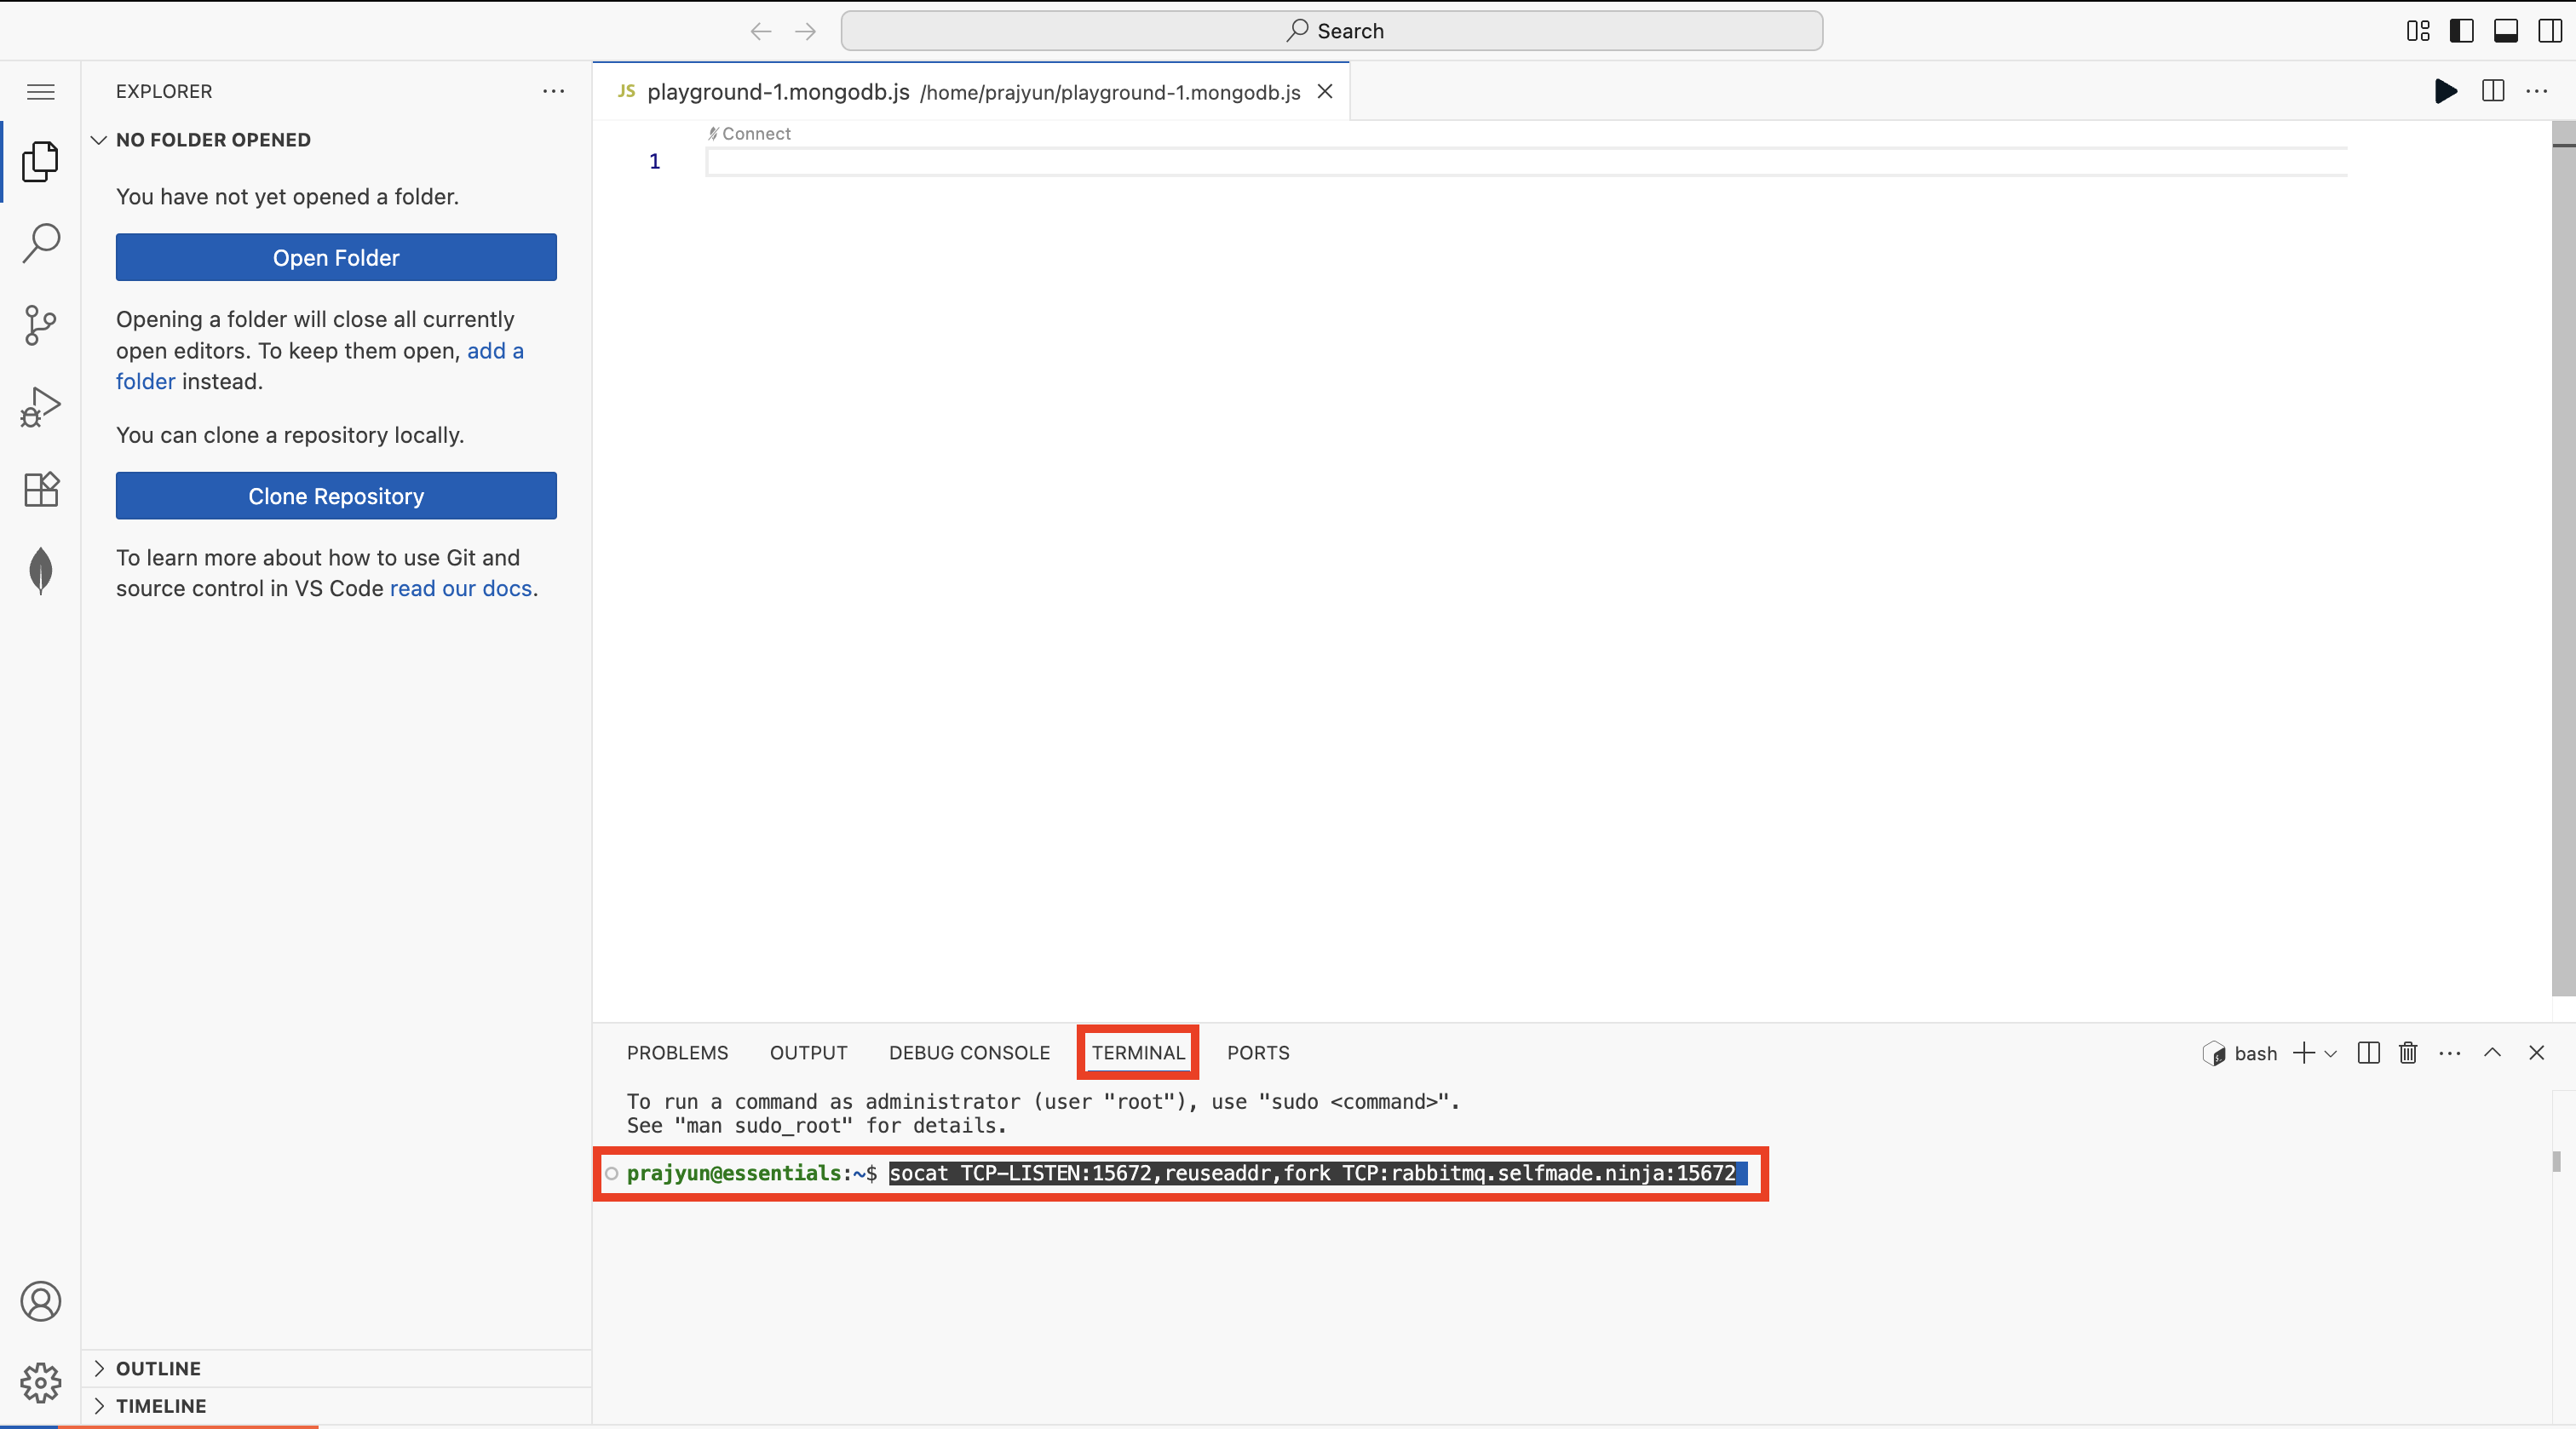
Step 2: Execute Port Forwarding
Go back to the VS Code Editor, then open a new terminal, then paste the command and hit enter.
Now, click on the Port tab and then copy the URL that you can find under the Forwarded Address. Once you copy this URL, open a new tab and paste the link and hit enter.
Step 3: Access RabbitMQ Interface
Once you copy this URL, open a new tab and paste the link and hit enter.
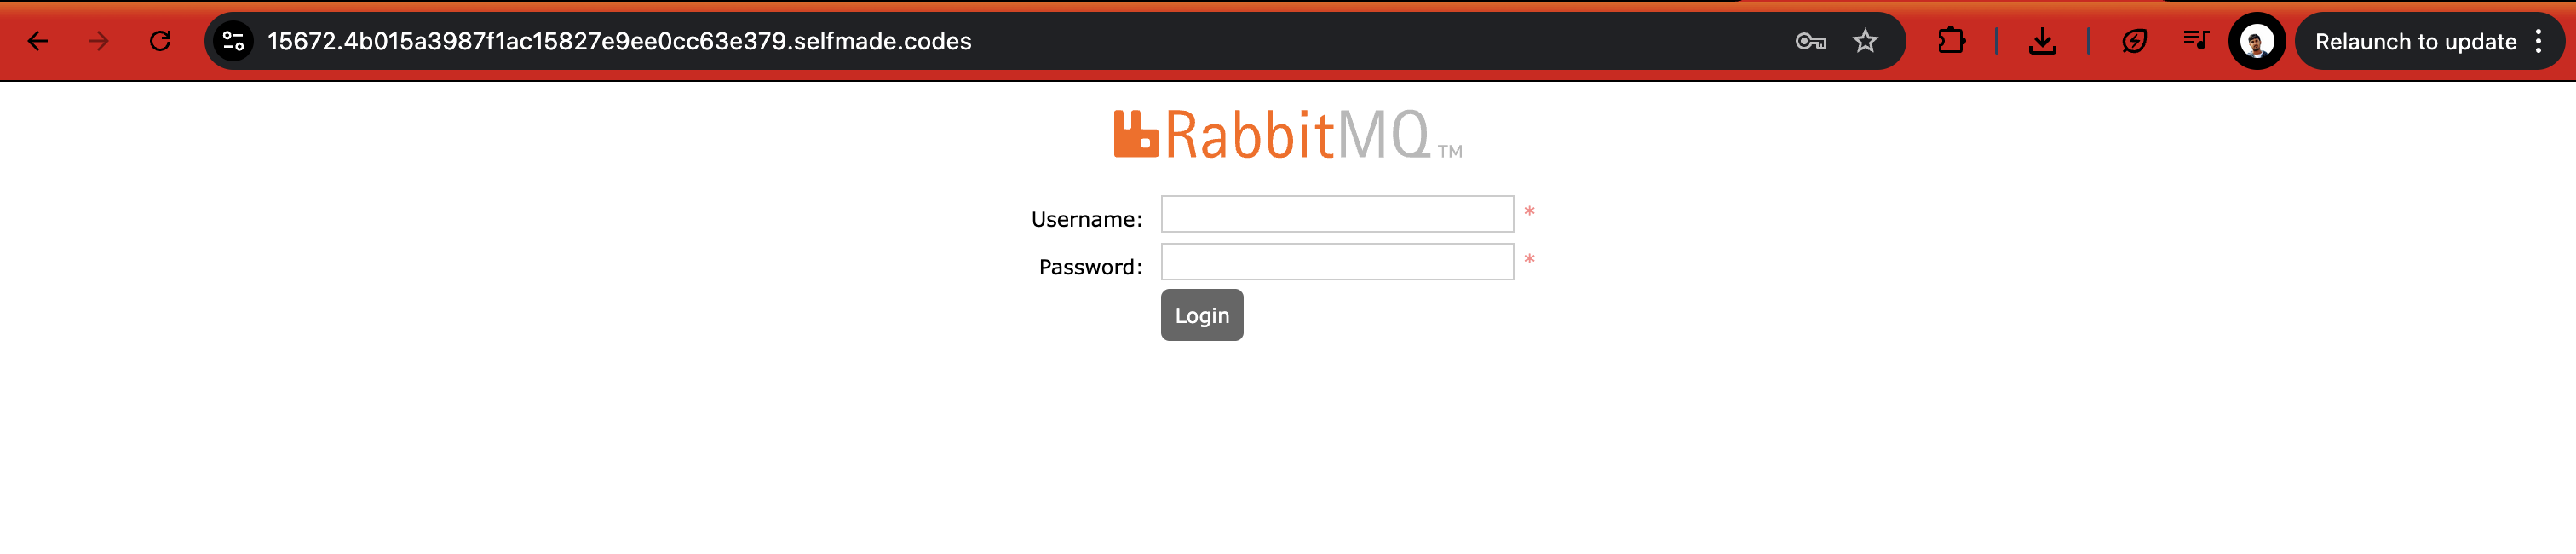
The RabbitMQ management interface provides a web-based tool for monitoring and managing your message broker.
User Management
Create RabbitMQ User
Now, where can you find the username and password? First, we need to create a new RabbitMQ user inside the RabbitMQ Service. Go to the Services page, then find the RabbitMQ Service and then click on Manage.
Then, find the Create RabbitMQ User, fill in the details and then click on Add User
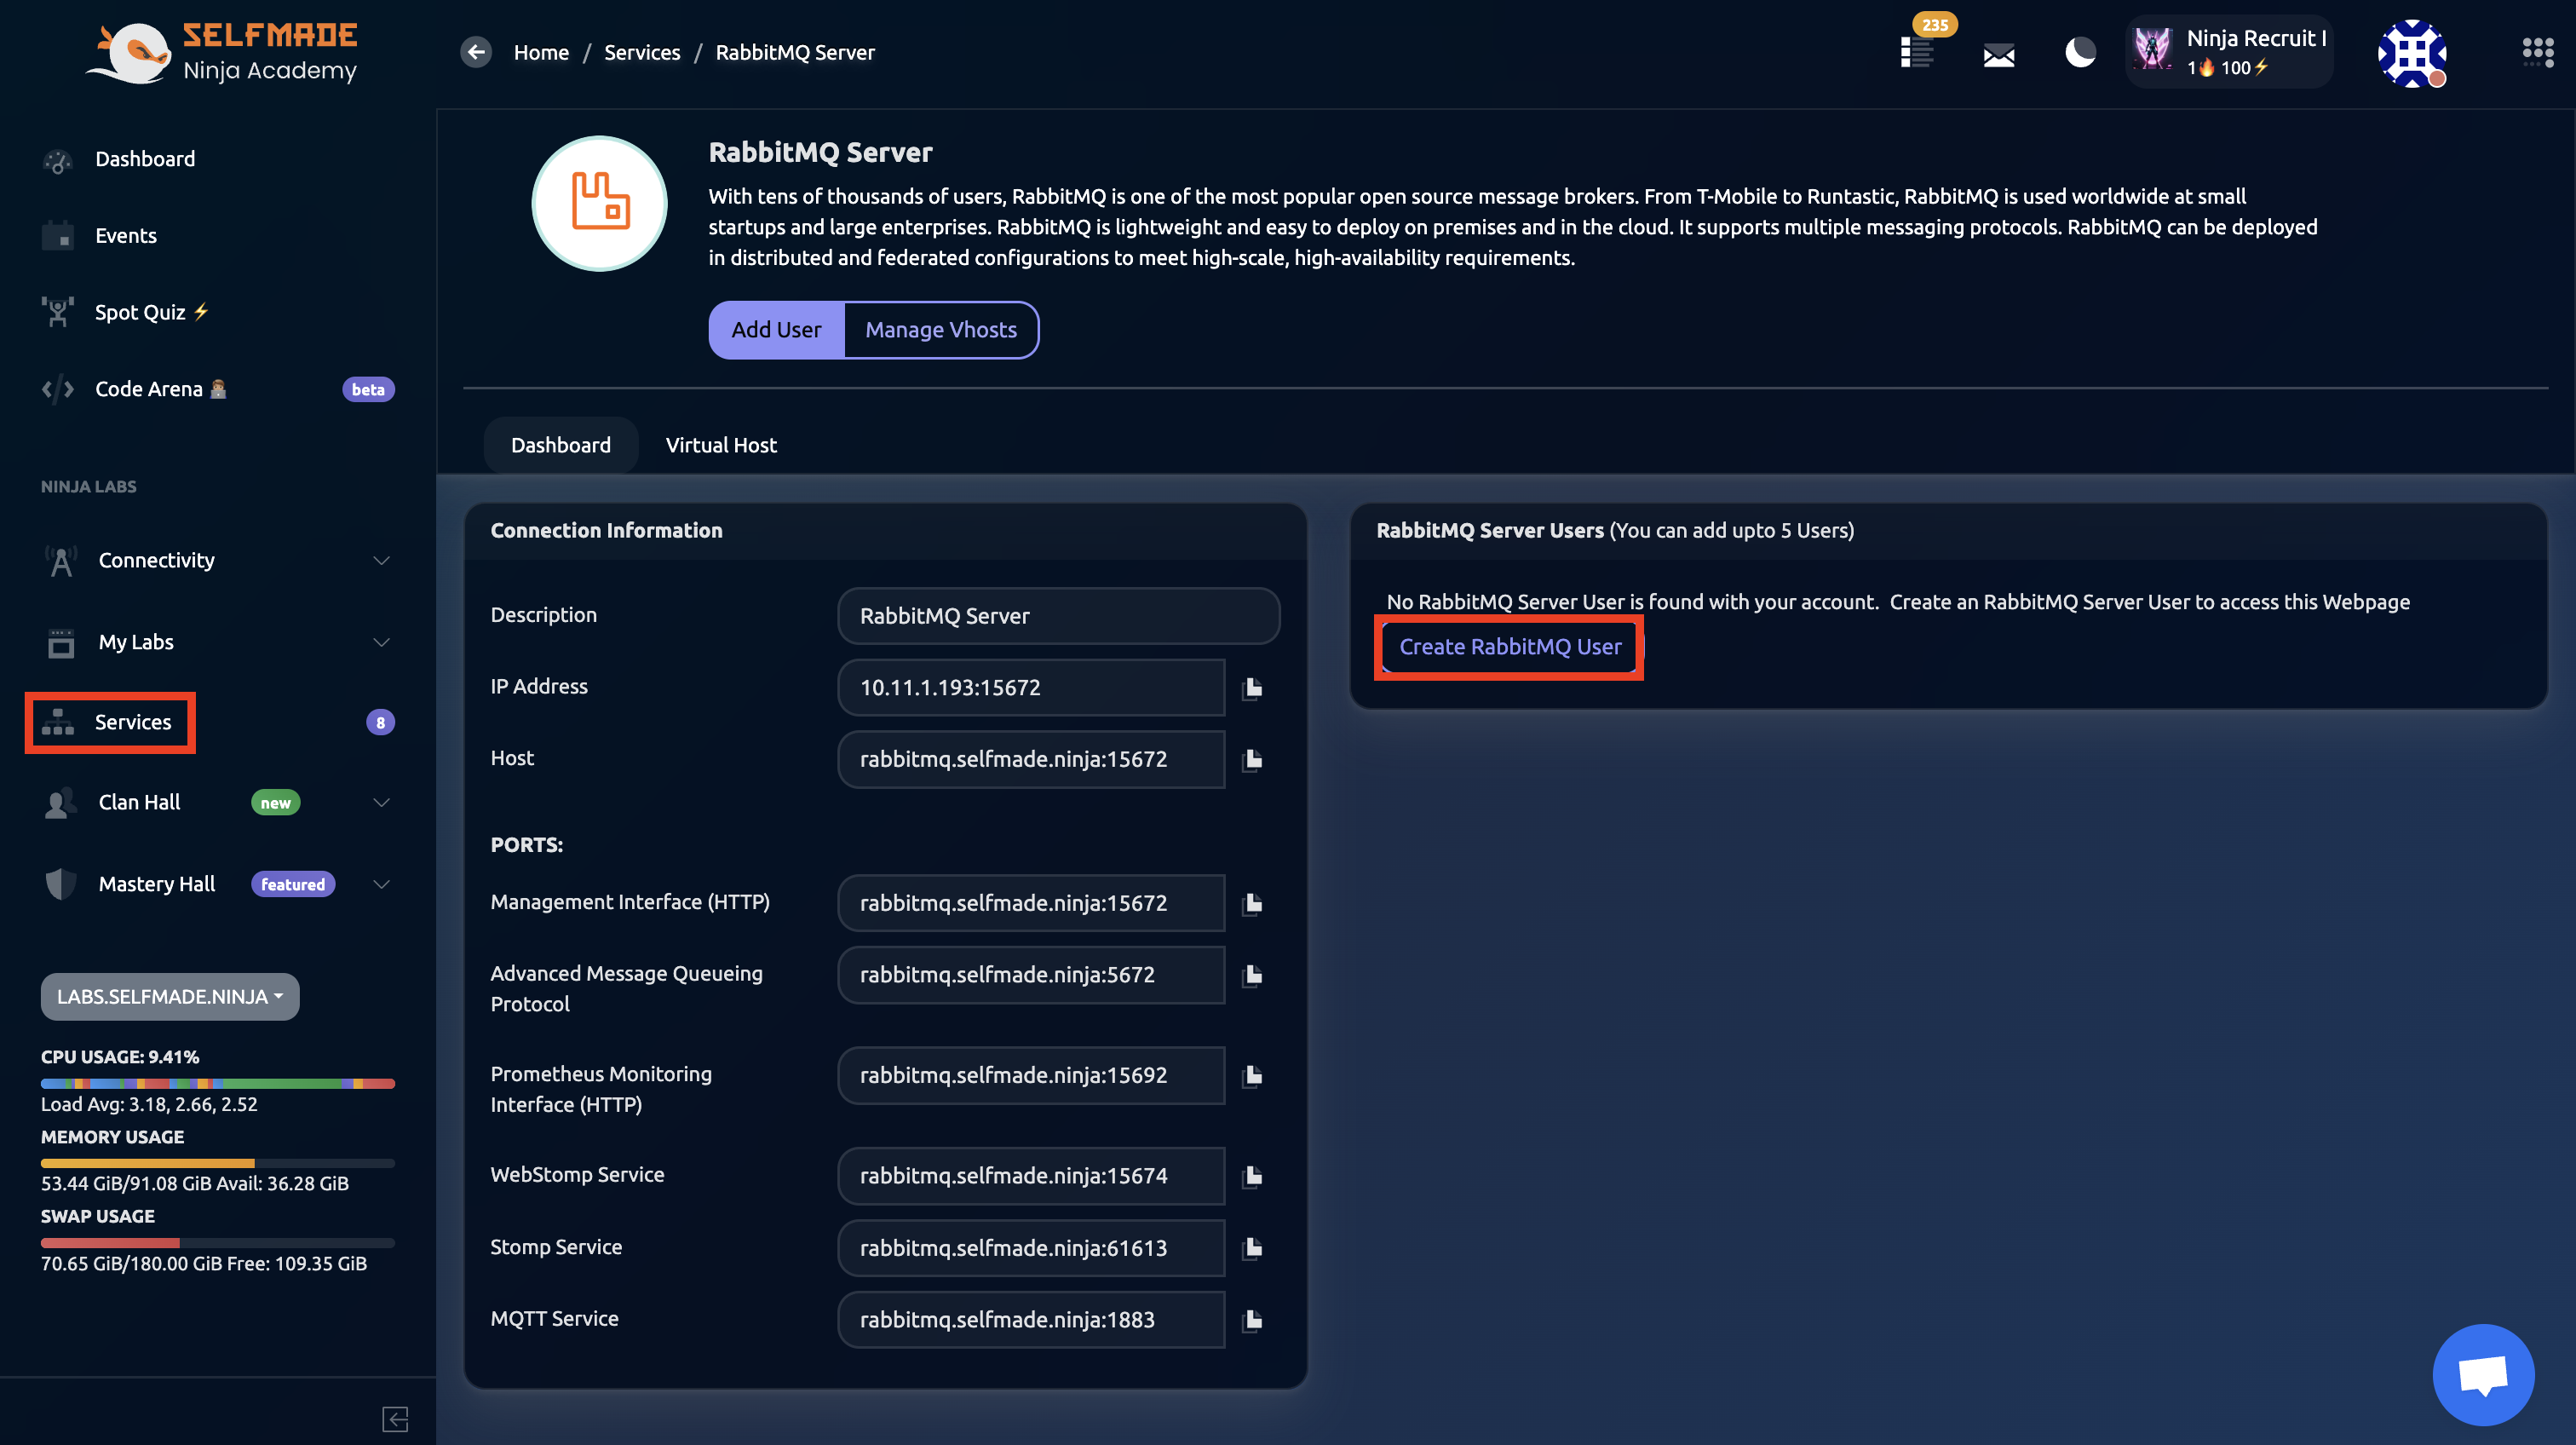
If you want to use MQTT via RabbitMQ server, you must create a Virtual Host (Vhost).
Virtual Host Configuration
Create Vhost RabbitMQ Server for MQTT
A vhost in MQTT is a virtual messaging space within a single MQTT broker, allowing for the isolation and organization of MQTT resources such as topics and clients. It helps keep different projects or applications separate and secure within the same MQTT infrastructure.
Once you're on the RabbitMQ Services page, look for and click the "Manage Vhost" option.
Within the Vhost management interface, you can enter the desired vhost name as needed. This step allows you to create and configure virtual hosts to organize and separate your RabbitMQ resources and messaging components efficiently.
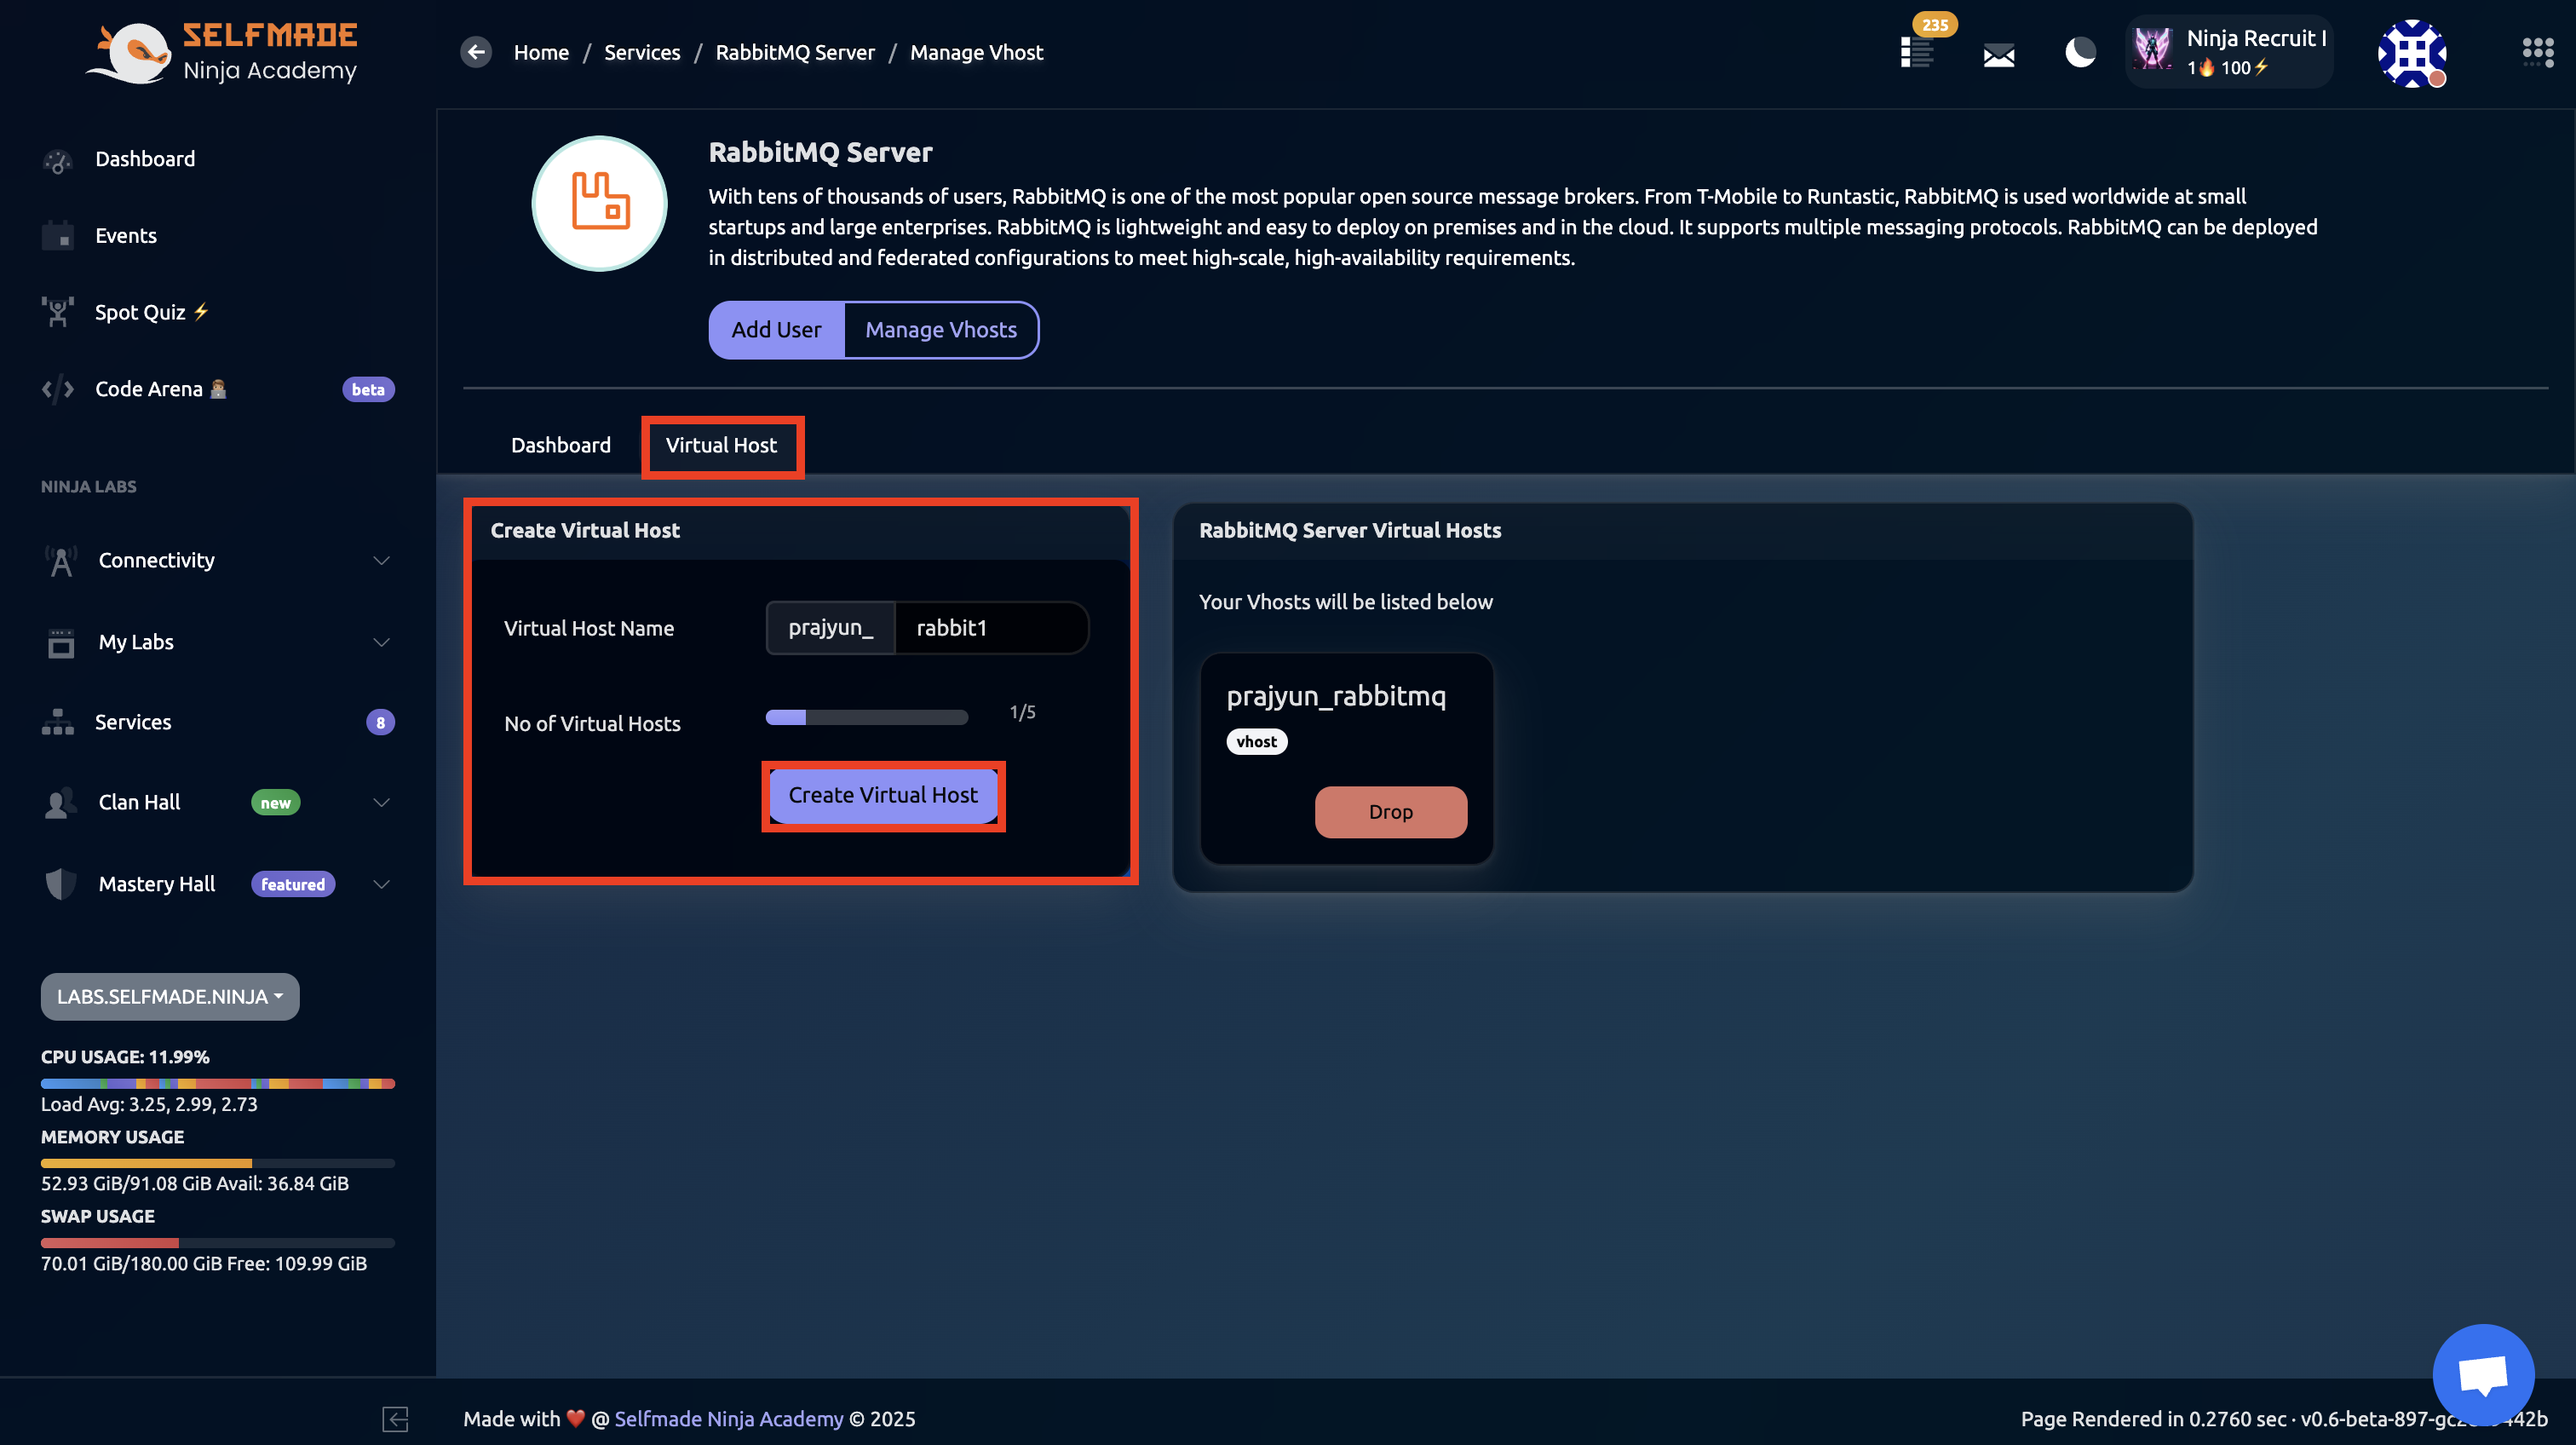
Virtual hosts provide namespace isolation, allowing multiple applications to share the same RabbitMQ instance securely.
Additional Resources
Implementation Guide
If you'd like to know how to implement MQTT in your project, kindly visit this link: Hosting MQTT Service in Selfmade Ninja Labs. This is our Selfmade Ninja Blog which gives extensive information about the entire process.
What You Can Do
| Feature | Description |
|---|---|
| Message Queuing | Send and receive messages between applications |
| Topic Routing | Route messages based on topics and patterns |
| Durable Queues | Persist messages for reliable delivery |
| Clustering | Scale message processing across multiple nodes |
- Use appropriate queue durability settings for your use case
- Implement proper error handling for message processing
- Monitor queue depths and consumer performance
- Use virtual hosts to separate different applications